How to Create Background Paper Using Stamps & Ink
Creating your own background paper is one of the best ways to have your background coordinate with the focal point of your handmade card. Because you have control over both the stamps and inks used, your background it will coordinate perfectly with the rest of your card. Plus, Stampin’ Up! offers great stamp sets for creating backgrounds. In addition, many stamp sets include stamps designed for creating your own background paper..
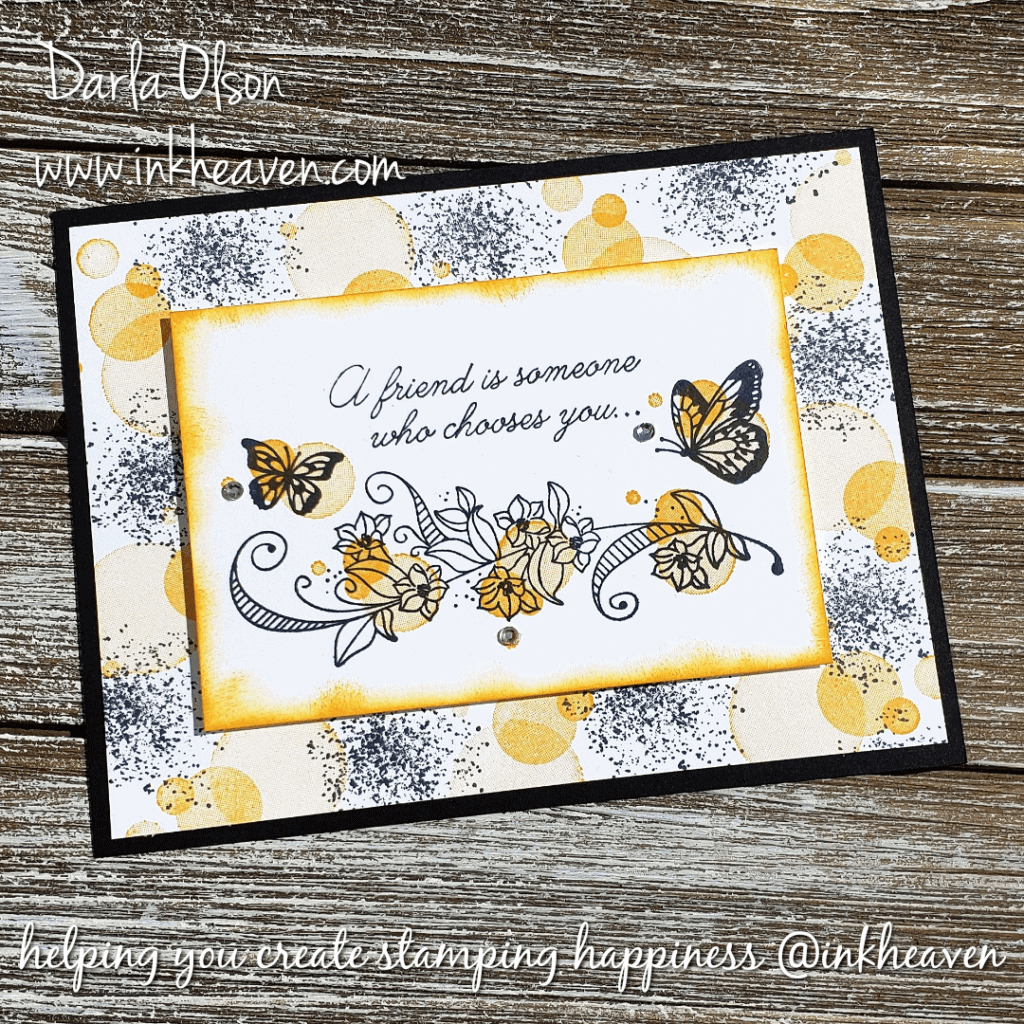
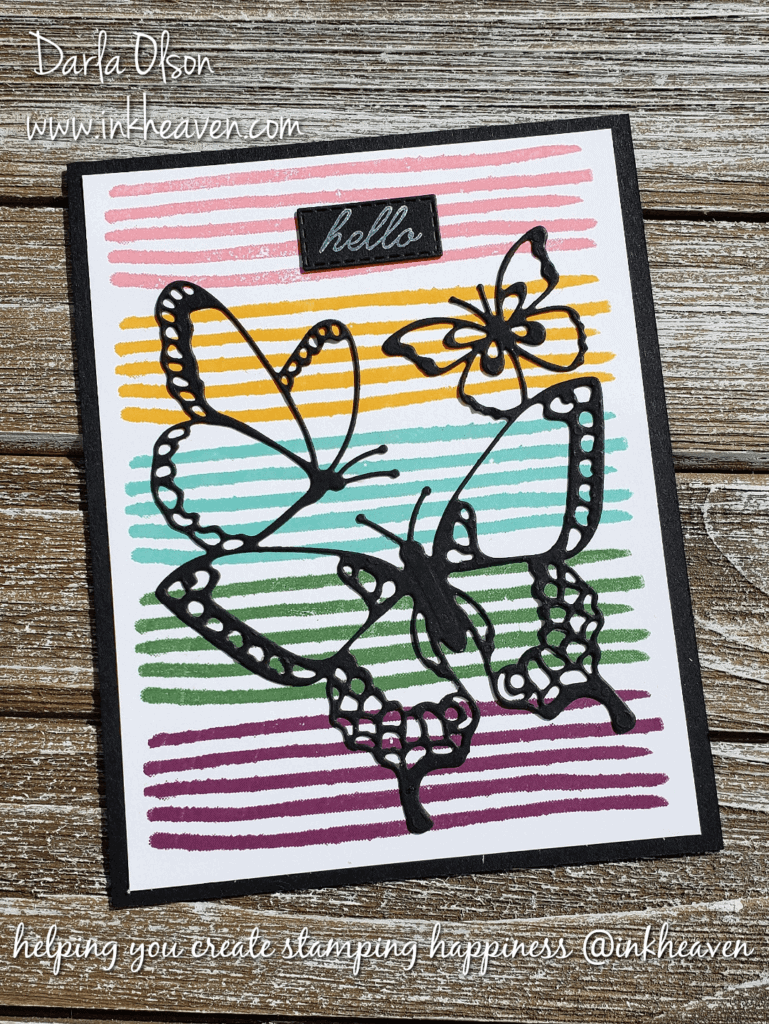
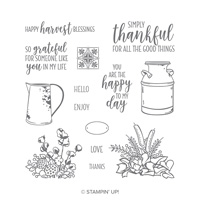
For example, this card has a background created with stamps and ink. Since the Beauty Abounds stamp set includes stamps designed for backgrounds, all the images work well together. Consequently, it is perfect for simple stamping and creating backgrounds!
In this instance, I paired Basic Black ink with Mango Melody ink reminiscent of common butterfly colors. For additional coordination, these same colors are used on the front layer. Then a border of Mango Melody ink is sponged around the front layer in order to help it stand out from the stamped background .
For this card, the background is stamped with two different stamps which are inked in different colors and then alternately stamped in a pattern. However, there are many options in addition to this for creating a background.
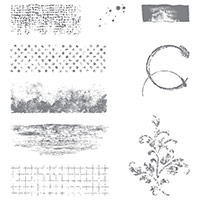
Here are some ideas to demonstrate different ways to create background paper with stamps and ink:
- One ink color, one image, randomly repeated. See background example – CLICK HERE
- One ink color, one image, stamped in a repeated pattern. See background example – CLICK HERE
- One ink color, one image, stamped to create a corner. See background example – CLICK HERE
- Two ink colors, two images, stamped in a repeated pattern, and overlaid. See background example – CLICK HERE
As can be seen, these ideas for creating backgrounds are just the tip of the iceberg! To get you started here is a shopping list and a tutorial for this card!
Get the supplies you need to create this card:
CLICK HERE to get the free tutorial


Specials and Offers – CLICK HERE
Display Board Sample With Stamped Background Paper
This card from my display board is an example of a stamped background paper using multiple inks and one stamp, repeatedly stamped to create a pattern. The background stamp is from the Incredible Like You stamp set. Unfortunately, this stamp set will be retiring on June 3rd, 2019. To learn more about what is retiring – CLICK HERE
Thank you for stopping by to visit. If you have any questions, or need any help creating background paper, please ask! I love helping you create stamping happiness for yourself and loved ones!
If you enjoyed learning how to create background paper, you might also enjoy seeing these backgrounds created with stamps and ink – CLICK HERE and CLICK HERE

Sponge Brayer Background Technique Creates Quick Color
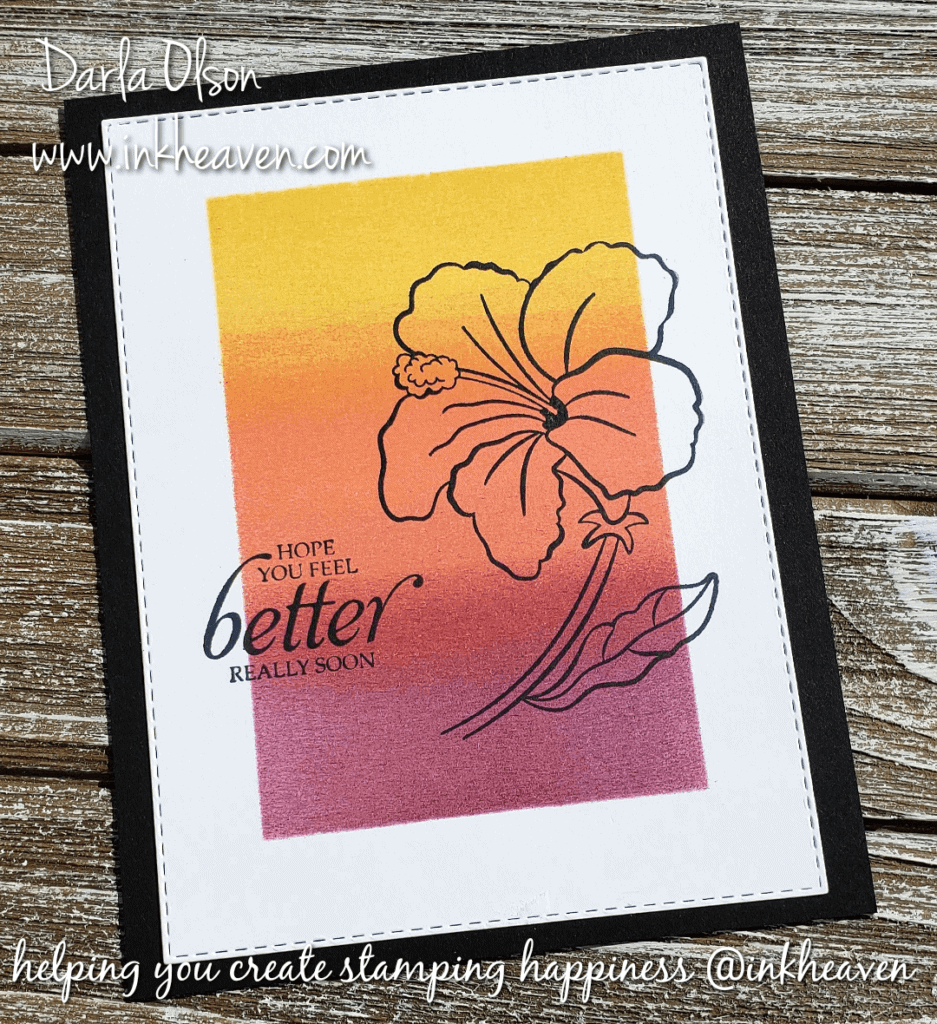
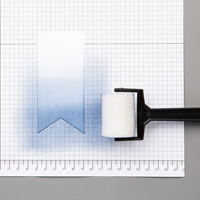
Easy Sponge Brayer Background Technique
I’m not a huge fan of doing lots of coloring on my handmade cards. As a result, I love techniques that provide quick color for my stamped images. This sponge brayer background technique does just that and it’s very easy to do!
Things you will need to create a background like the one above:
- Sponge brayer
- A template or mask to define background
- Silicone mat or other surface to adhere mask and cardstock to
- 3 ink pads in colors that coordinate
Watch the Facebook Live video replay below for a demonstration of the technique:
Get The Supplies I Used:


Specials and Offers – CLICK HERE
The Humming Along Stamp set that I used to highlight the sponge brayer background technique (plus several other stamp sets that I referenced in my Facebook Live) is retiring and will no longer be available after June 3rd, 2019! To learn more about these Last Chance Products – CLICK HERE
If you don’t have a copy of the Color Combo charts that I shared in my Facebook Like you can get those and a sneak peek of the new, upcoming In Colors – CLICK HERE
As promised, I am sharing another project with you, along with a free tutorial. This project was a make & take from my Sale-a-bration Open House in March. Sadly, this stamp set used on this easy project will not be carrying over into the new catalog. In addition, it is also on the retiring list!
Sale-a-bration Open House Make & Take With Tutorial
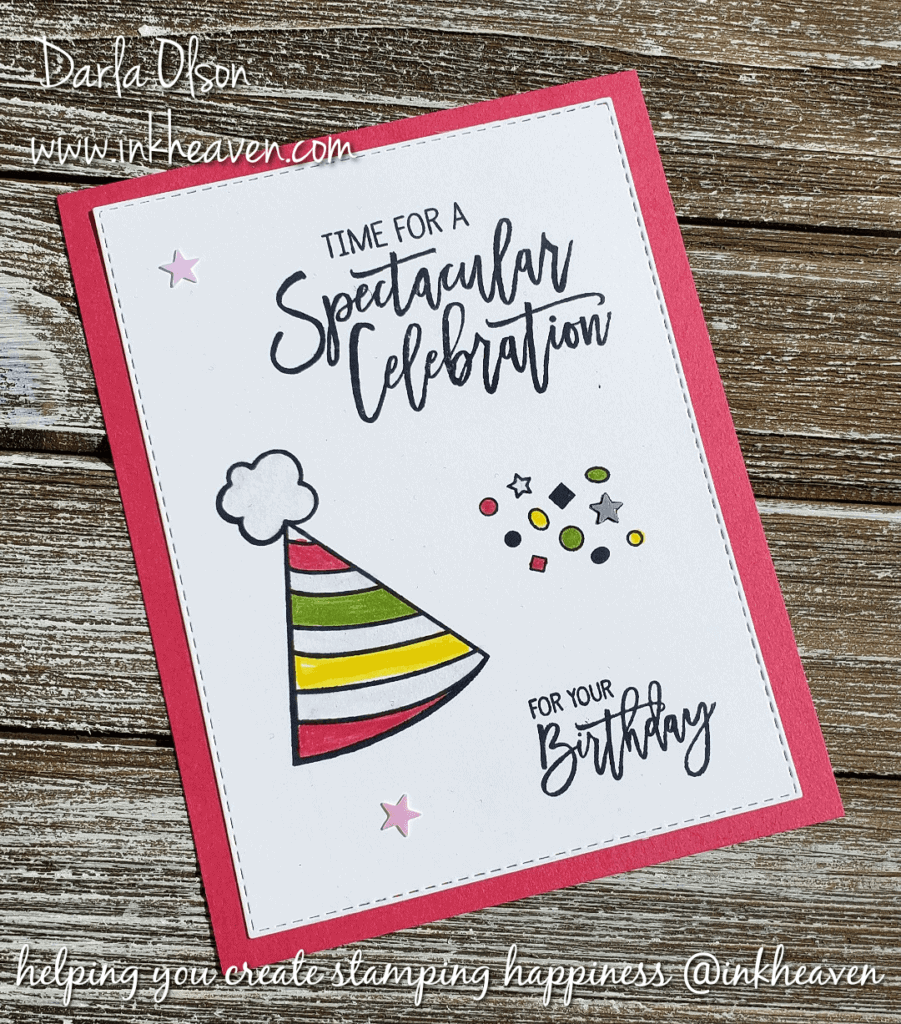
The simple images in Birthday Cheer are perfect for simple stamping! To get the free tutorial – CLICK HERE
Thank you for stopping by to visit. If you have any questions, or need any help creating these cards, please ask! I love helping you create stamping happiness for yourself and loved ones!
If you enjoyed this sponge brayer background technique, you might also enjoy this simple sponging technique – CLICK HERE
Wishing You A Lovely Day With a Simple Sponging Technique
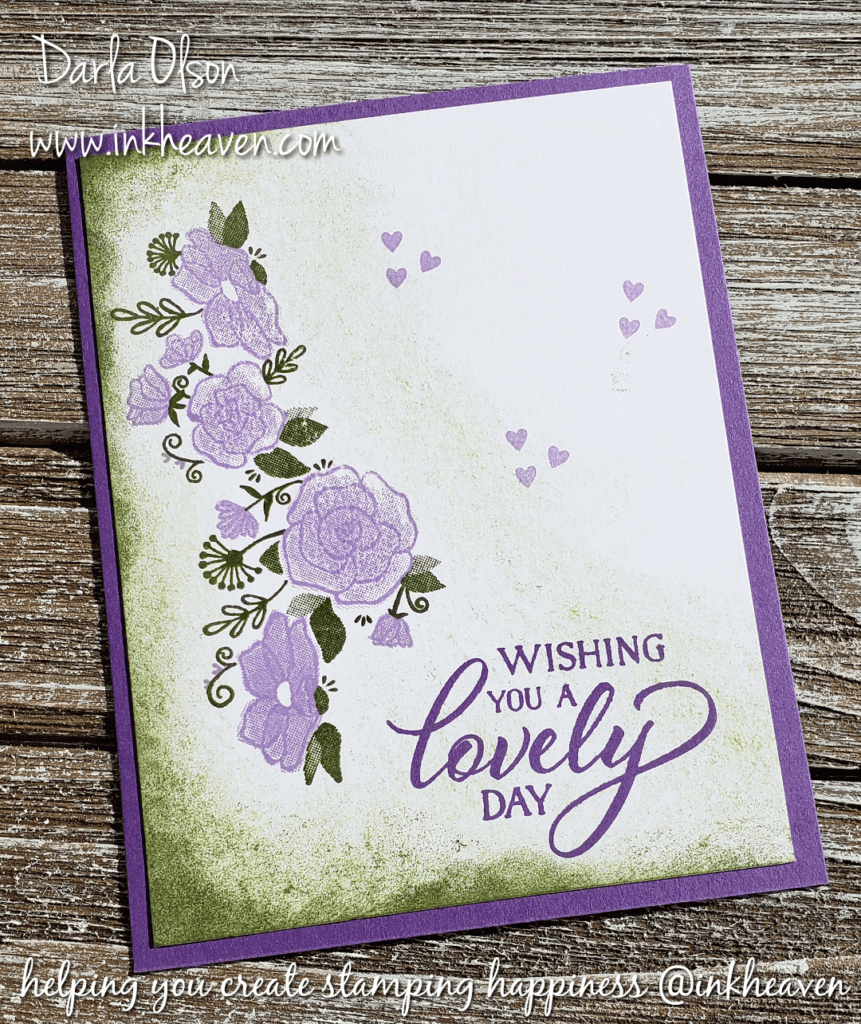
Use Simple Sponging Technique To Add More Color & Interest
Sometimes, all you need is some simple sponging to add more color and interest to a card. For instance, the sponging on this card adds a patina to the background. In addition, it draws the eye towards the key images and sentiment.
This lovely sponged card was one of four make and takes at my Sale-a-bration Open House events. Since I know that not all of you are able to attend these fun events, I like to share the tutorials with you! Get the tutorial – CLICK HERE
In addition, sponge brayers are an easy way to add background color – check out that technique – CLICK HERE
Preparing for my Open House events takes an enormous amount of time. Consequently, I am unable to do a blog post for all of my creations. Since that is the case, I thought I would share two projects per post for a few weeks even though Sale-a-bration is over. (Some of the projects may contain Sale-a-bration stamps. I will try to recommend a substitution when possible).
This Card Has A Fun Feature!
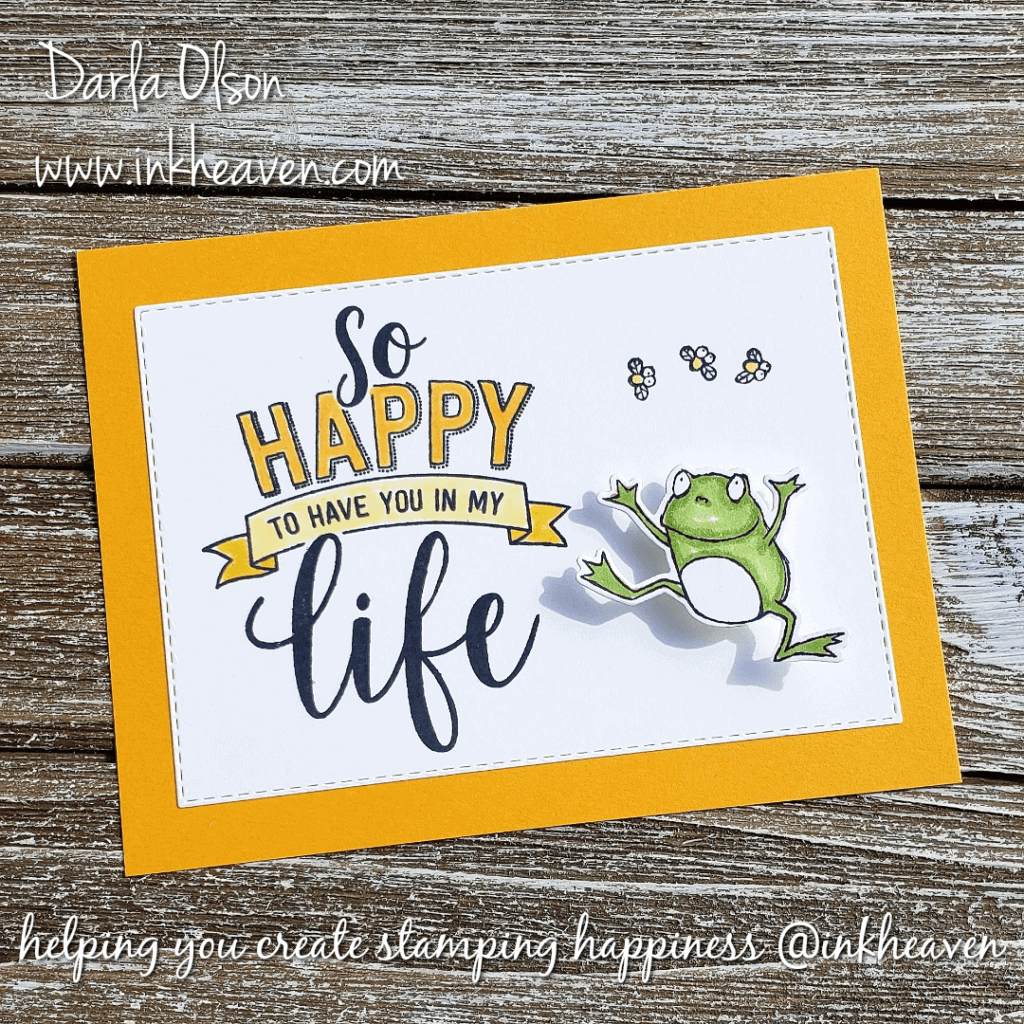
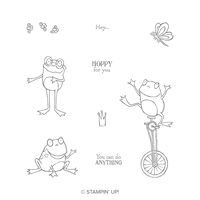
This fun card has no sponging. However, it does have a fun feature that is quite easy to do! This cute frog from So Hoppy Together literally leaps right off the card! Plus, this style of card can be created with any critter that you have in your stamp stash! To make your critter leap off the card all you need is:
- Window Sheet
- Scoring Tool
- Bone Folder
- Glue Dots
I cut a strip of Window Sheet about 1/2″ wide and about 1-1/2″ long. Then, I scored it every 1/2″. After scoring, I creased it into a zig zag (Z) with my bone folder. Lastly, I used glue dots to attach it to the frog and card. How simple is that? Get the supplies you need to create this card:
Get the supplies you need to create this card:
Please note that Sale-a-bration is over and the So Hoppy Together stamp set is no longer available. However, I think the squirrel from Fable Friends would be a great substitution if you don’t own So Hoppy Together!


Specials and Offers – CLICK HERE
To learn more about the 2019 Occasions Catalog – CLICK HERE
Thank you for stopping by to visit. If you have any questions, or need any help creating these cards, please ask! I love helping you create stamping happiness for yourself and loved ones!
If you enjoyed these projects and simple sponging technique you might also enjoy this technique – CLICK HERE
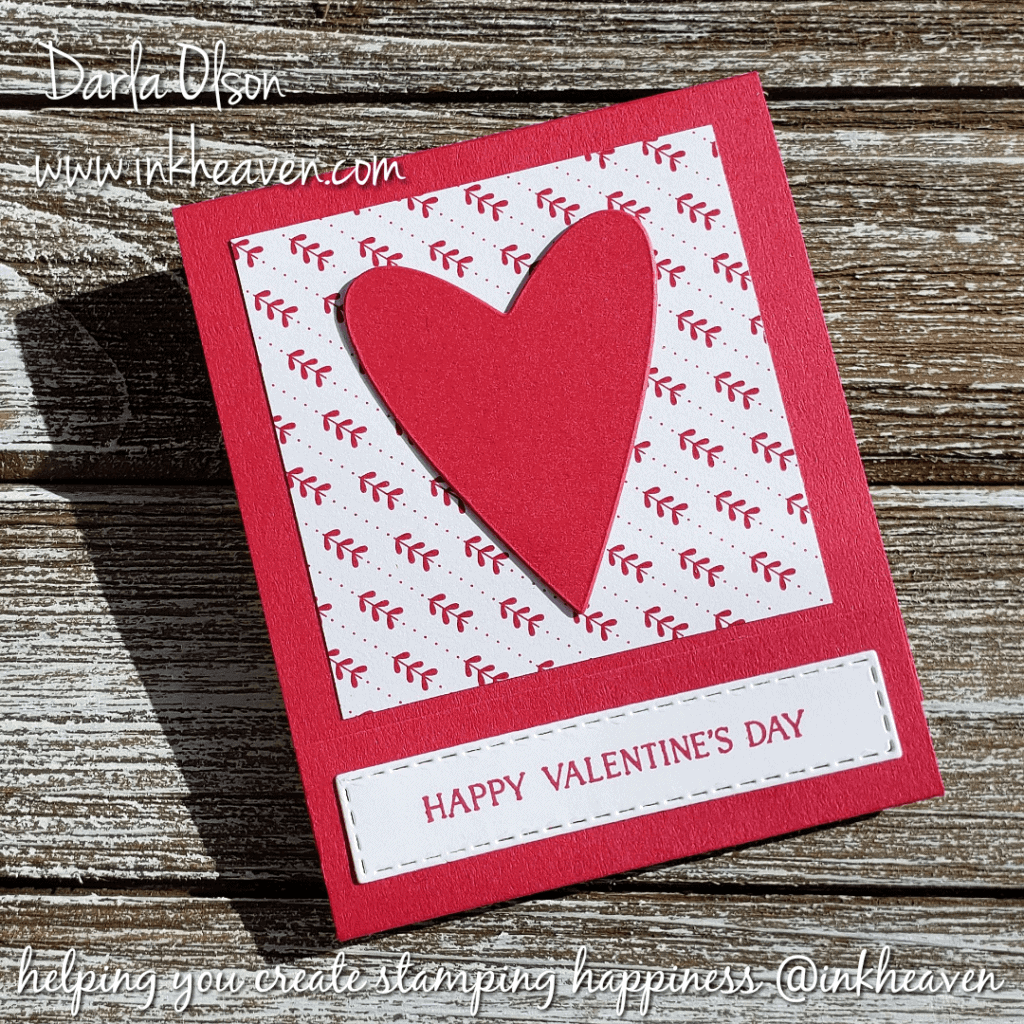
Happy Valentine’s Day! You Make Me Happy Masking Technique Card
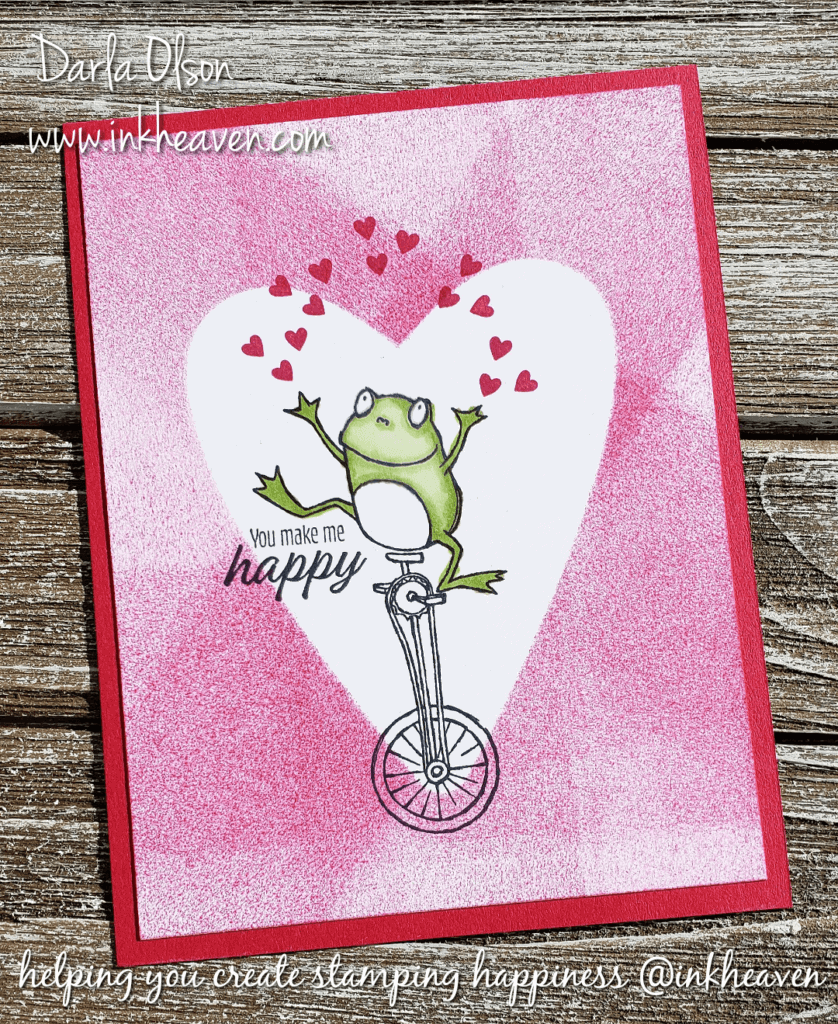
Happy Valentine’s Day From Me To You!
I shared this fun Valentine’s Day card earlier during my Online Sale-a-bration launch on Facebook. Furthermore, I have already shared a few of those fun projects with you here on my blog. I also meant to share this one with you a bit sooner. However, I have been dealing with some structural, physical issues that make it difficult to do too many hours of computer work. Consequently, this post is a little later than I would have liked! In addition, if you missed my online launch, you can request to join the group to see all the projects, get the tutorials, and watch the videos. (Please note, there is no charge to be in this group!) CLICK HERE TO JOIN
This is a fun card that can be used for Valentine’s Day, or anytime, to acknowledge those in your life that make you happy. It looks complicated. However, it’s created using a simple masking technique that packs a lot of punch!
Additionally – I have some happy news about the free, So Hoppy Together, Sale-a-bration stamp set that I used to create this card! (To learn more about Sale-a-bration – CLICK HERE) Beginning March 1st, Stampin’ Up! will be offering Sale-a-bration Coordination products for a limited time! One of them will be framelits for this this adorable stamp set! The framelits will be available from March 1st through March 31st OR while supplies last! Be sure to check my specials and offers page on March 1st for all of the juicy details!
The Masking Technique
Masking with shapes to highlight an image is one of my favorite techniques. This is probably due to so many shapes nowadays that can be created with dies and punches which means no fussy cutting!
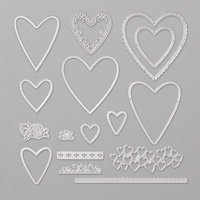
Here is what you will need to duplicate this technique:
- Heart shaped die or punch
- Foam brayer
- Image stamp to highlight
- Ink pads
- Card stock
- Window Sheet (optional)
- Washi Tape or temporary adhesive
Follow these steps:
- Die cut or punch your heart shape from Window Sheet (You can also use paper or card stock. I like to use a window sheet and save it for future use.)
- Attach the shape to your card with washi tape rolled up underneath (or with temporay adhesive)
- Ink up your foam brayer and roll over your card randomly until you like how it looks.
- Carefully remove your Window Sheet shape (it will be covered in ink!)
- Stamp the image you want to highlight in the center of the image you created with mask.
Create your own Valentine’s Day You Make Me Happy Masking Technique card with this tutorial and shopping list:
But wait! Before you shop – you need to know about Sale-a-bration! Sale-a-bration is Stampin’ Up!’s premier annual sale! Given that, with every $50 you spend you will earn a FREE Sale-a-bration item of your choice! To learn more about Sale-a-bration – CLICK HERE.
For the tutorial with photo, measurements, shopping list, and directions – CLICK HERE
Please remember, shopping with me allows me to continue sharing these fabulous techniques, ideas, and tutorials!

Specials and Offers – CLICK HERE
To learn more about the 2019 Occasions Catalog – CLICK HERE
To learn more about Sale-a-bration – CLICK HERE
Thank you for stopping by to visit. If you have any questions, or need any help with this masking technique, please ask! I love helping you create stamping happiness for yourself and loved ones!
If you enjoyed this project and technique you might also enjoy this project and technique – CLICK HERE
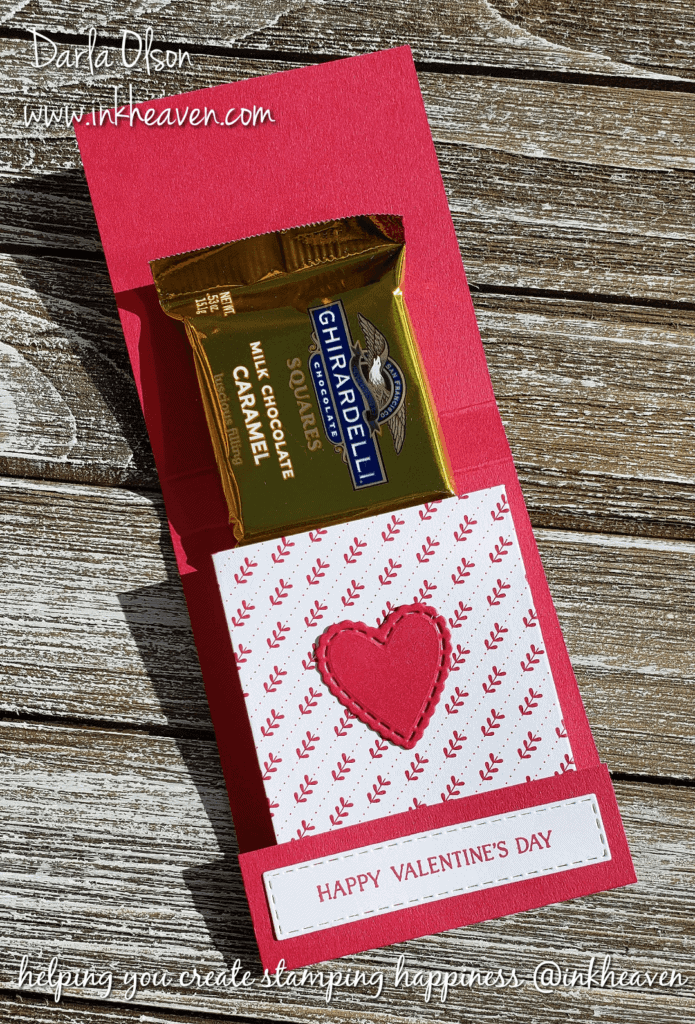
Light My Fire With Chocolate, Valentine! Matchbook Cover
Light My Fire With Chocolate! Create This Fun Matchbook Cover Gift!
This fun matchbook is nothing new. I have made all kinds of these in various sizes in the past! Since it’s time to prepare for Valentine’s Day, I think it is time to update this little gem with some new stuff! Speaking of new stuff, the Rectangle Stitched Framelit Dies inspired the update to this creation. In particular, the one that perfectly holds the, “Happy Valentine’s Day”, sentiment. Given that it was a great size for the “flint” on a matchbook cover, I just had to give it a go!
In addition to a free tutorial for you that includes a photo, measurements, instructions, and a supply list, I also have a Facebook Live how-to video to share with you below! Since it is a Valentine, and I do love chocolate, I had a little fun naming my project! What better name for a matchbook than, “Light My Fire With Chocolate, Valentine!”?
Inside of the Matchbook Cover Valentine
Create your own matchbook cover with this tutorial and shopping list:
But wait! Before you shop – you need to know about Sale-a-bration! Sale-a-bration is Stampin’ Up!’s premier annual sale! Given that, with every $50 you spend you will earn a FREE Sale-a-bration item of your choice! To learn more about Sale-a-bration – CLICK HERE.
For the tutorial with photo, measurements, shopping list, and directions – CLICK HERE
K

Specials and Offers – CLICK HERE
To learn more about the 2019 Occasions Catalog – CLICK HERE
To learn more about Sale-a-bration – CLICK HERE
Watch Video For More Detailed Instructions
Thank you for stopping by to visit. If you have any questions, or need any help creating this Light My Fire With Chocolate, Valentine! Matchbook cover, please ask! I love helping you create stamping happiness for yourself and loved ones!
If you enjoyed this project – you might like this simple Valentine project & card – CLICK HERE
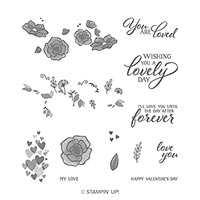
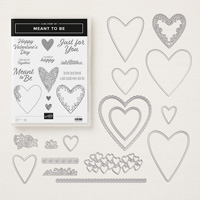
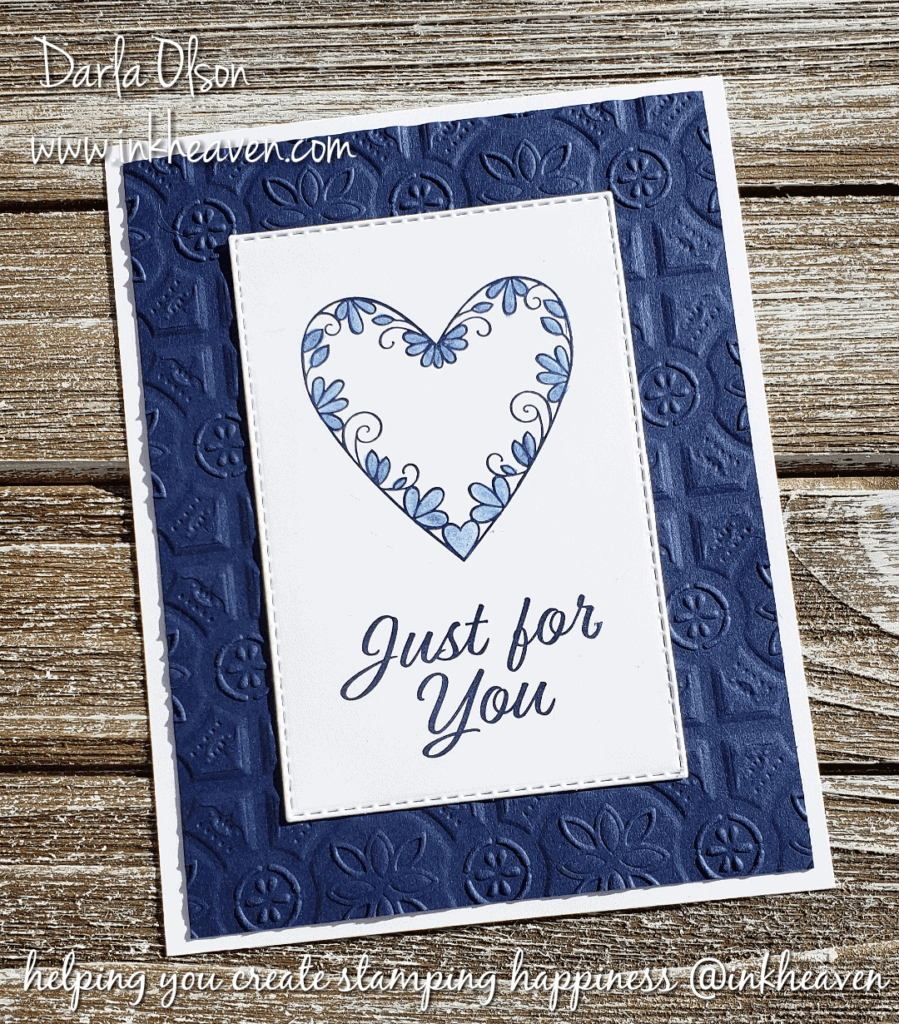
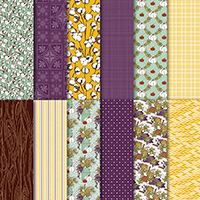
Create This Easy Handmade Floral Heart Valentine For Your Sweetheart
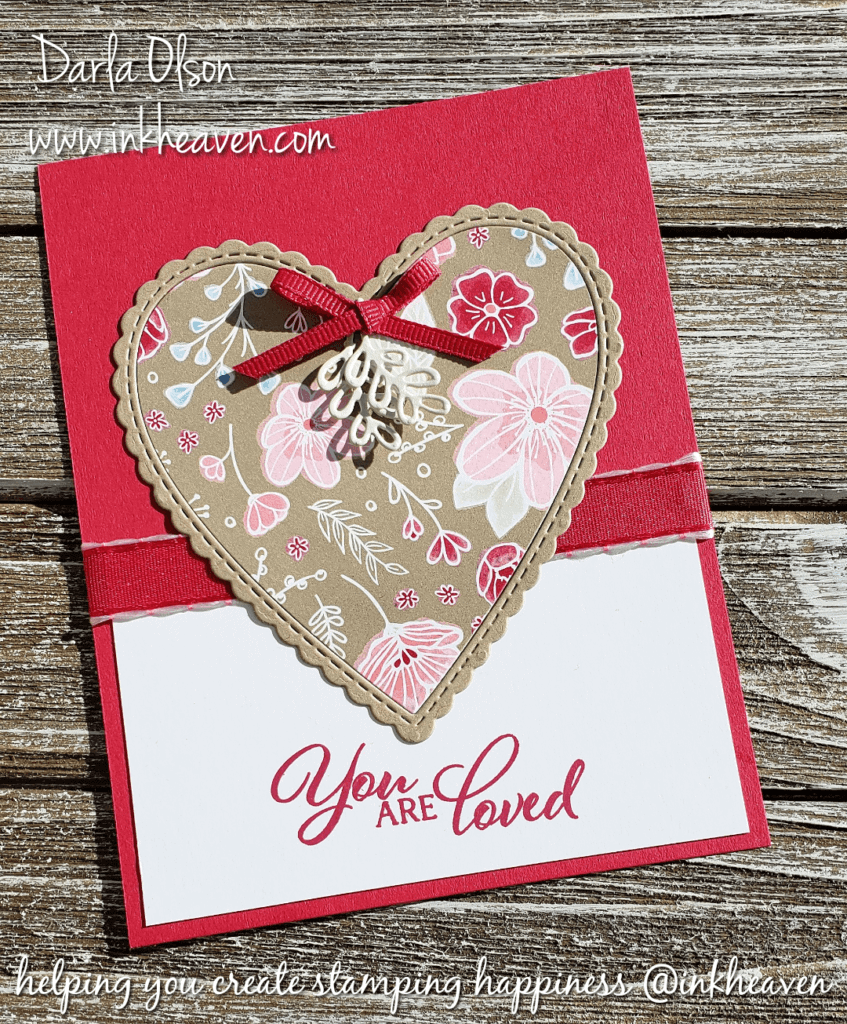
Create this easy, floral heart Valentine for your sweetheart
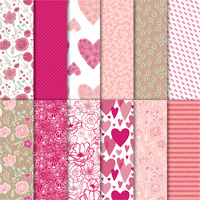
You can create this easy, floral heart Valentine for your sweetheart in less than a half hour! In addition, the layout is simple enough that you can easily make substitutions. Here is what you will need:
- Heart-shaped die or pattern
- Floral background paper
- Coordinating card stock
- Valentine sentiment stamp
- Coordinating ink
In my floral heart Valentine card, I used the colors in the background paper to choose my card stock colors. If you struggle with color coordination, keep in mind that Stampin’ Up! does the color coordination for you. As a result, it is very easy to create a well-designed card.
Create your own floral heart Valentine with this tutorial and shopping list:
But wait! Before you shop – you need to know about Sale-a-bration! Sale-a-bration is Stampin’ Up!’s premier annual sale! Given that, with every $50 you spend you will earn a FREE Sale-a-bration item of your choice! To learn more about Sale-a-bration – CLICK HERE.
For the tutorial with photo, measurements, shopping list, and directions – CLICK HERE


Specials and Offers – CLICK HERE
To learn more about the 2019 Occasions Catalog – CLICK HERE
To learn more about Sale-a-bration – CLICK HERE
Thank you for stopping by to visit. If you have any questions, or need any help creating this floral heart Valentine, please ask! I love helping you create stamping happiness for yourself and loved ones!
If you enjoyed this card – you might like this simple Valentine project & card – CLICK HERE
Faux Tea-Stained Heart-Shaped Gift Box For Valentine’s Day
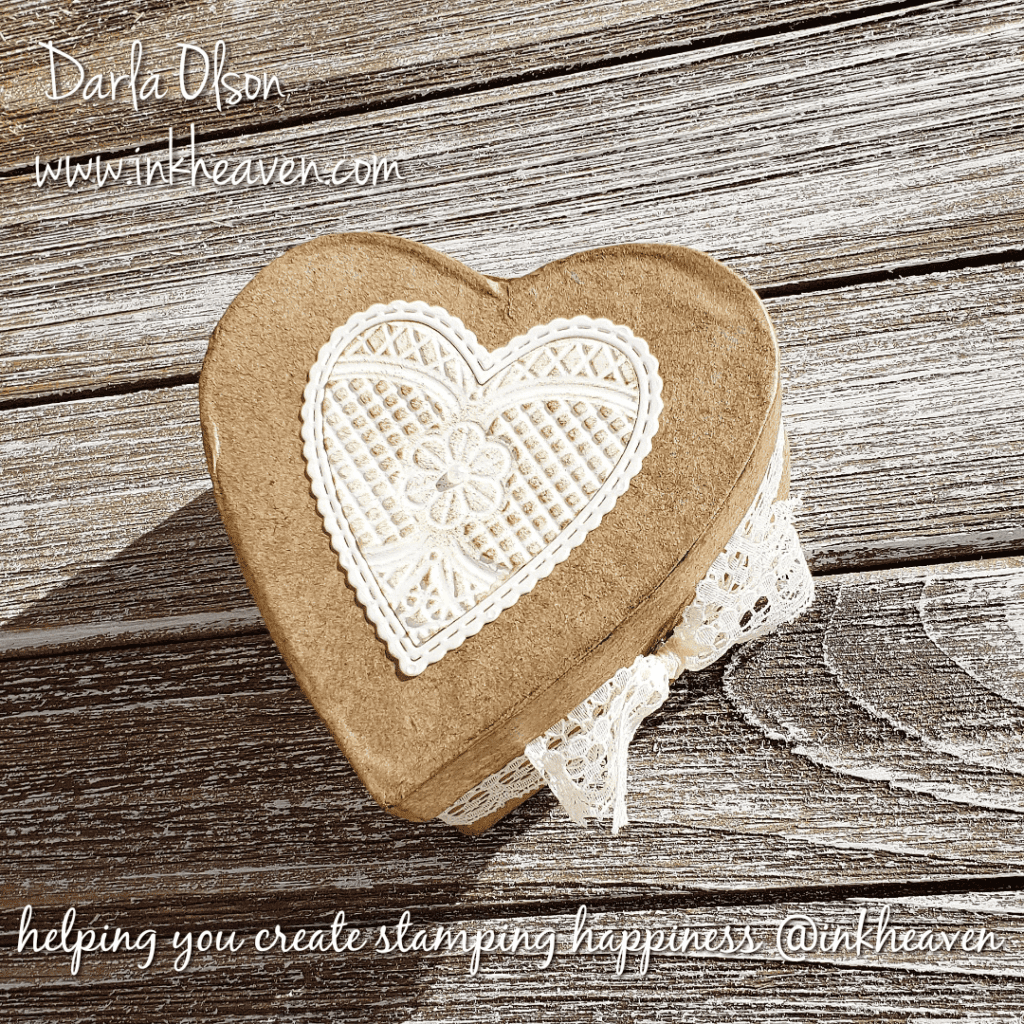
Create Faux Tea-Stained Heart Boxes For Gift Giving
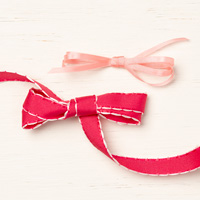
I love creating fun little gifts to share with friends and co-workers on Valentine’s Day. This Faux Tea-Stained Heart-Shaped Box is a quick and easy idea for your Valentine’s Day treat giving! Not only that, but I have a coordinating handmade card idea for you as well! Plus, I have a free tutorial download and a video presentation cut from a Facebook Live for you! Both the box and coordinating card are demonstrated in the video.
In addition to the shopping list below you will need the following items to create your faux tea-stained heart-shaped box:
- 3″ Paper Mache Heart Box
- Stapler
Shopping List To Create Your Own Heart-Shaped Boxes


Coordinating Handmade Valentine’s Day Card
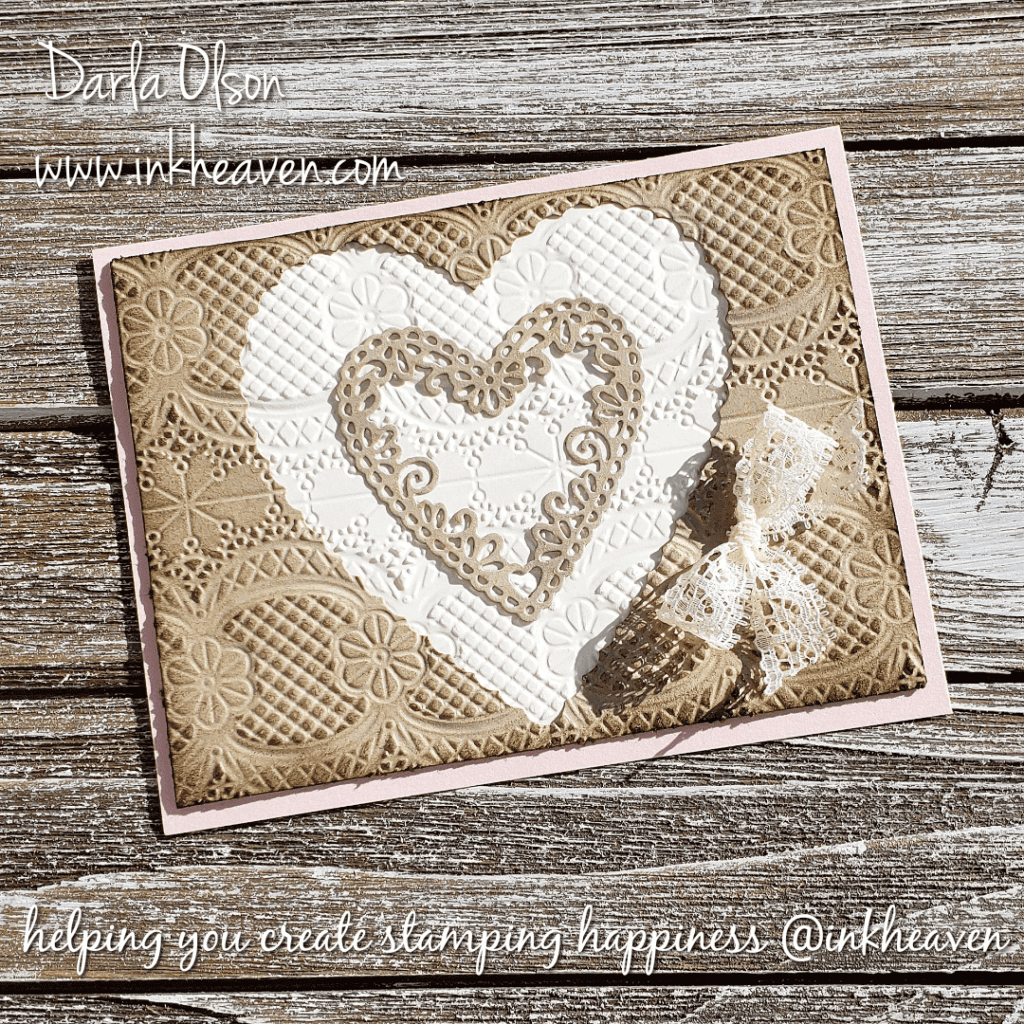
Create this coordinating card to give with your Faux Tea-Stained Heart-Shaped Box filled with treats! Download this free tutorial which includes a shopping list, dimensions, and instructions – CLICK HERE
Watch this video for a complete how-to demonstration of the box and card:
Be sure to shop inkheaven for your supplies. But wait! Before you place your order – be sure to read all about Sale-a-bration and how you can earn FREE product with every $50 you spend! To learn more about Sale-a-bration – CLICK HERE
Specials and Offers – CLICK HERE
To learn more about the 2019 Occasions Catalog – CLICK HERE
Thank you for stopping by to visit. If you have any questions, or need any help creating your Faux Tea-Stained, Heart-Shaped Box and Valentine’s Day card, please ask! I love helping you create stamping happiness for yourself and loved ones!
If you enjoyed this card – you might like this card with the Lace Dynamic Embossing Folder as well – CLICK HERE
Learn This Easy Blender Pen Technique Featuring Meant To Be
Easy Blender Pen Technique For Monochromatic Coloring
This easy blender pen coloring technique has been around forever! However, I have a tendency to get all caught up in the latest trends. Which means, sadly, that I forget about these oldies, but goodies! In the event that this technique is old news to you, I have paired it with some exciting new things from the brand new , 2019 Occasions Catalog! To learn more about the 2019 Occasions Catalog, CLICK HERE
To be honest, I do not know what this blender pen technique is officially called. However, since the technique pulls color from a stamped image, I have dubbed it, “Color Pulling.”
To color pull you will need:
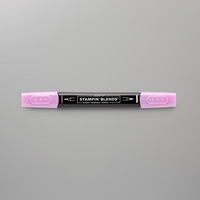
- A blender pen
- Water-based dye ink
- Stamp of your choice
- Whisper White card stock
Now you are ready to color pull! First, stamp your image on Whisper White card stock. Secondly, use the blender pen to pull color from the stamped image and blend it out to the areas that you would like color to be. That’s it! Easy peasy! Tip: I have found that color pulling works best on a freshly stamped image.
Because the blender pen picks up ink, it will be necessary to clean it. To remove the excess ink from your blender pen, swipe it across scratch paper until it no longer spreads color. Keep in mind that the ink will stain the blender pen. However, the solution in the blender pen will be clear when the excess ink has been removed.
Create your own card with this tutorial and shopping list:
But wait! Before you shop – you need to know about Sale-a-bration! Sale-a-bration is Stampin’ Up!’s premier annual sale! Given that, with every $50 you spend you will earn a FREE Sale-a-bration item of your choice! To learn more about Sale-a-bration, CLICK HERE.
For the FREE tutorial, CLICK HERE.


Specials and Offers – CLICK HERE
To learn more about the 2019 Occasions Catalog – CLICK HERE
To learn more about Sale-a-bration – CLICK HERE
Here is a quick FB Live video demonstrating this card:
This video was a FB Live during my 2019 Occasions & Sale-a-bration Online Launch. CLICK HERE to like and follow my Facebook Page.
During this video you may have heard me mention my January 10 for 1000 party. To make sure that you don’t miss special events like this that I sponsor for my customers, be sure to subscribe to my mailing list!
Thank you for stopping by to visit. If you have any questions, or need any help with the blender pen technique or creating this card, please ask! I love helping you create stamping happiness for yourself and loved ones!
If you enjoyed this card – you might like this sweet one featuring a free Sale-a-bration set – CLICK HERE
Use Shimmer Paint To Add The Frosty Look Of Winter
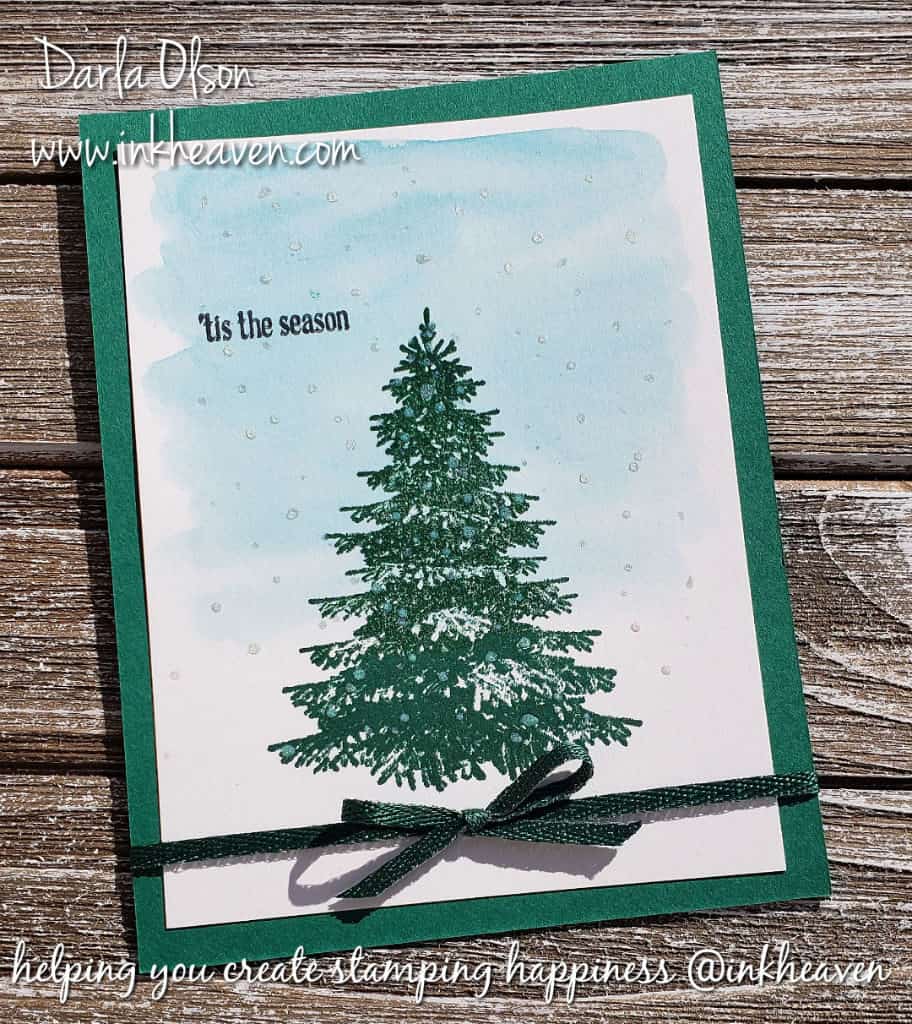
Shimmer Paint Adds The Frost Of Winter To This Handmade Card
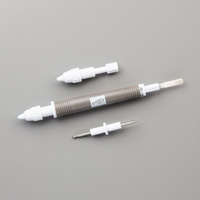
Shimmer paint is user friendly and is a great medium to use on your handmade cards! For instance, I created the snow on this card by dipping a stylus into the paint and dabbing it on. Definitely easy!
In addition to the shimmer, the paint adds texture to the card. Consequently, it adds interest to an otherwise very simple design.
The background on this card is a watercolor wash. I have a Facebook Live video in this post that will show you how to do that – CLICK HERE
As you can see, I did add a sentiment to this card. However, I think it would look fabulous without one! With that in mind, I would move the tree up just a bit.
This card was featured in my recent Mega Card Making Class in Waverly, Iowa.
Frosty Winter Woods Tutorial And Shopping List
For the free tutorial – CLICK HERE


Specials and Offers – CLICK HERE
To learn more about the 2018 Holiday Catalog – CLICK HERE
Thank you for stopping by to visit. If you have any questions, or need any help creating your own frosty Winter card, please ask! I love helping you create stamping happiness for yourself and loved ones!
Simply Thankful For All The Good Things Handmade Card
Express Your Thanks This Month
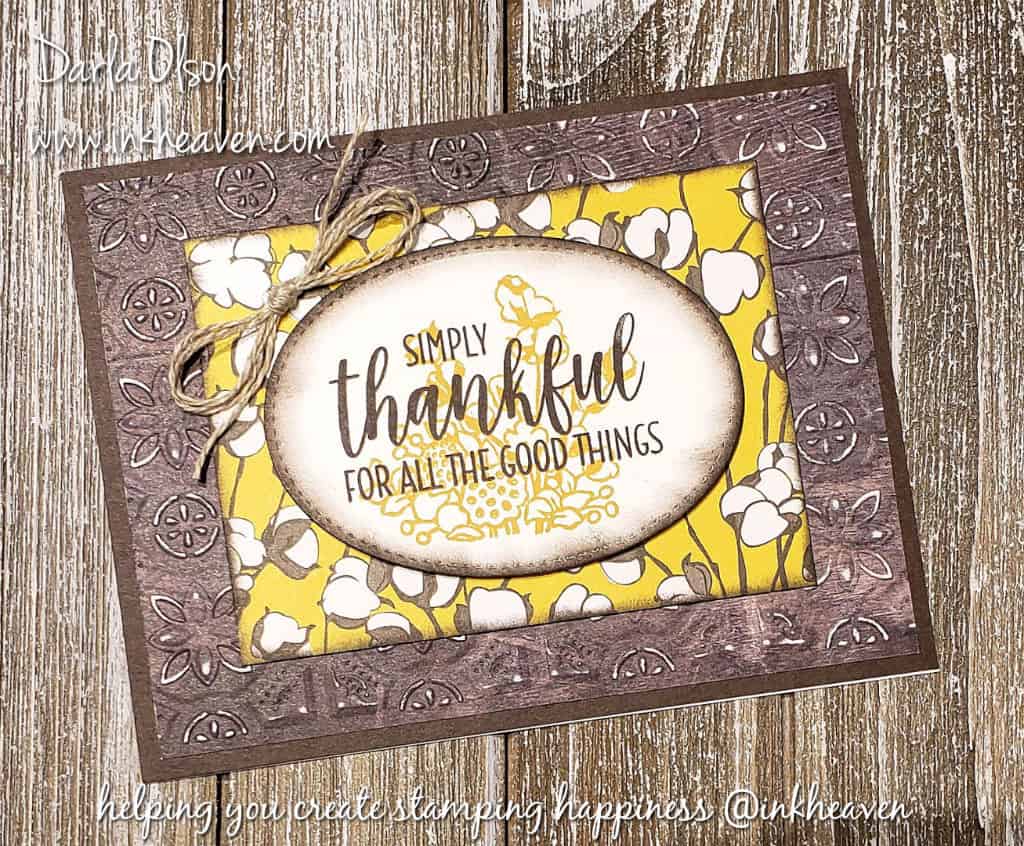
“Simply Thankful For All The Good Things” is the perfect sentiment for expressing your thanks. As we march towards Thanksgiving and the business of the holiday season, it’s a great time of year to pause and acknowledge all the good things that we are thankful for. Even better, is taking the time to share our gratitude with those we love. Spread a little joy with your stamping happiness!
Multiply Your Thankfulness
This card is perfect for mass production with the Stamparatus! With just two stamps and two inks used, the Stamparatus can be set up to stamp up a dozen or more cards of thanks in no time! To learn more about the Stamparatus – CLICK HERE
Simply Thankful Tutorial And Shopping List
For the free tutorial – CLICK HERE


For Specials and Offers – CLICK HERE
To learn more about the 2018 Holiday Catalog – CLICK HERE
Thank you for stopping by to visit. If you have any questions, or need any help creating this handmade card, please ask! I love helping you create stamping happiness for yourself and loved ones!
If you enjoyed this Simply Thankful card with Country Home, you might like this idea that turns it into Christmas! – CLICK HERE
For another fun, unique idea with Country Home – CLICK HERE
Need to send some thoughts and prayers? CLICK HERE
Celebrate Fall Birthdays With Nature Inspired Cards!
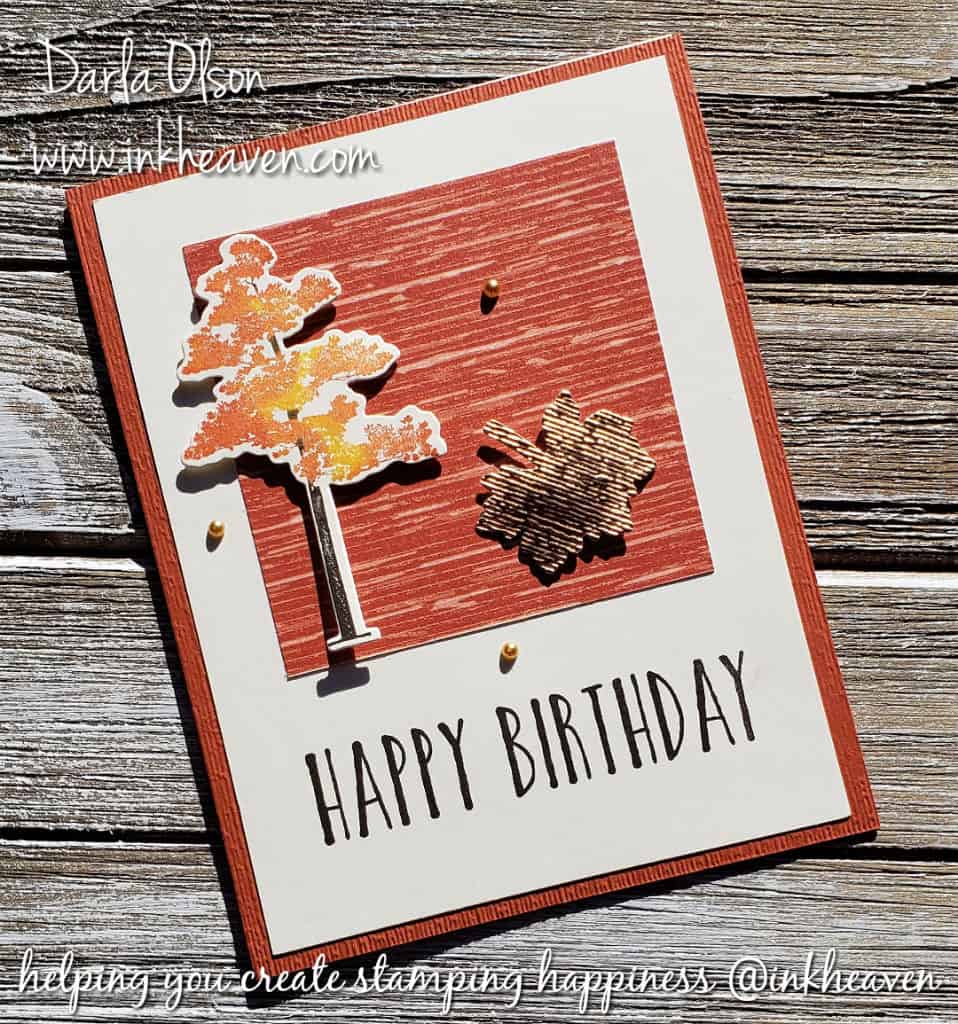
Nature Inspired Cards For Fall Birthdays
September is a month full of birthdays for my family and friends. It’s also the beginning of Fall, so I decided to create some Autumn cards to celebrate.
The Autumn birthday card above is a spin-off idea from another card idea. The original card below is a little more feminine and I wanted a more masculine birthday card for my brother. Both cards are nature inspired, feature similar Autumn colors, and use the same layout.
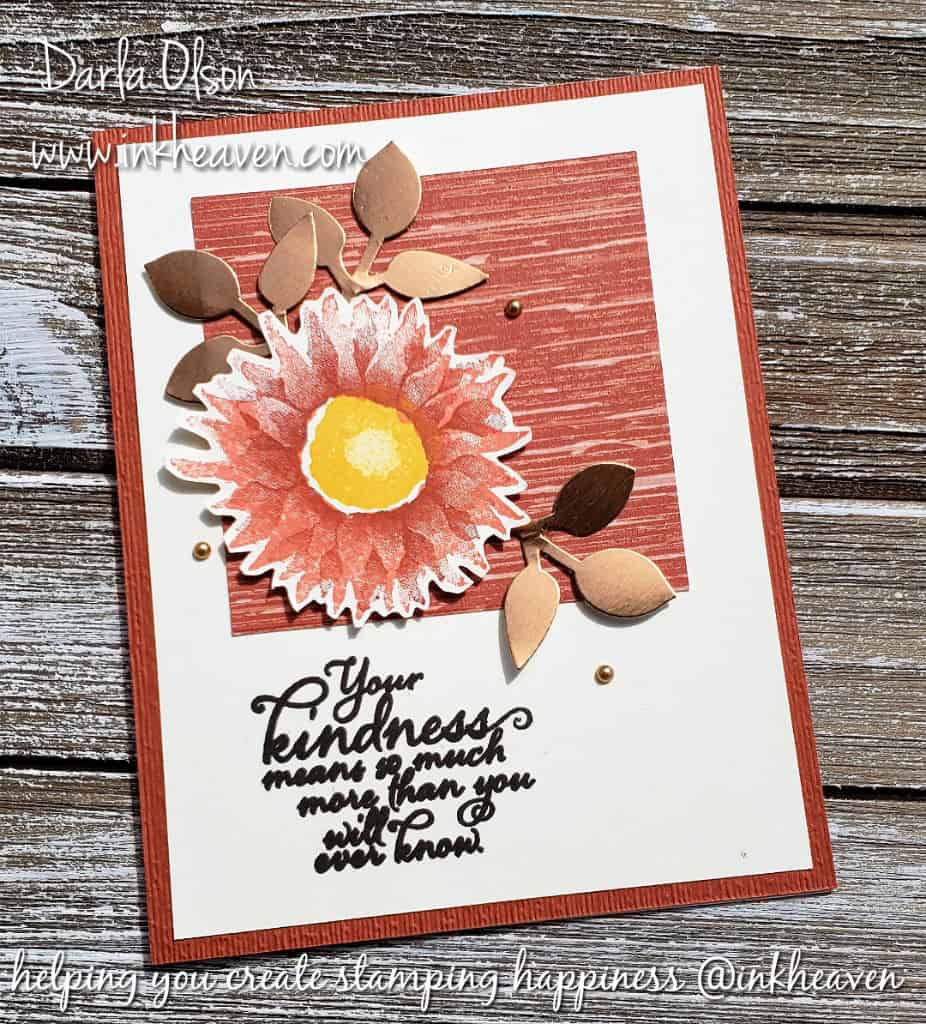
I originally created this nature inspired Fall card for a class featuring the Painted Harvest stamp set. I needed some birthday cards, so I decided to modify them slightly. For my mom’s birthday card, I just switched out the sentiment to the Happy Birthday sentiment that I used for my brother’s card above.
I also shared my class cards in a FB Live and demonstrated one of them. You can watch that video here:
To receive my free tutorials for my Painted Harvest Class, please subscribe to Inkheaven below:
If you would like to recreate this Fall, nature inspired birthday card and the designs in the tutorials, please shop my online store!
Specials and Offers – CLICK HERE
To learn more about the 2018 Holiday Catalog – CLICK HERE
Thank you for stopping by to visit. If you have any questions, or need any help creating your own Fall and nature inspired birthday cards, please ask! I love helping you create stamping happiness for yourself and loved ones!
Use The Tin Tile Embossing Folder To Create A Vase
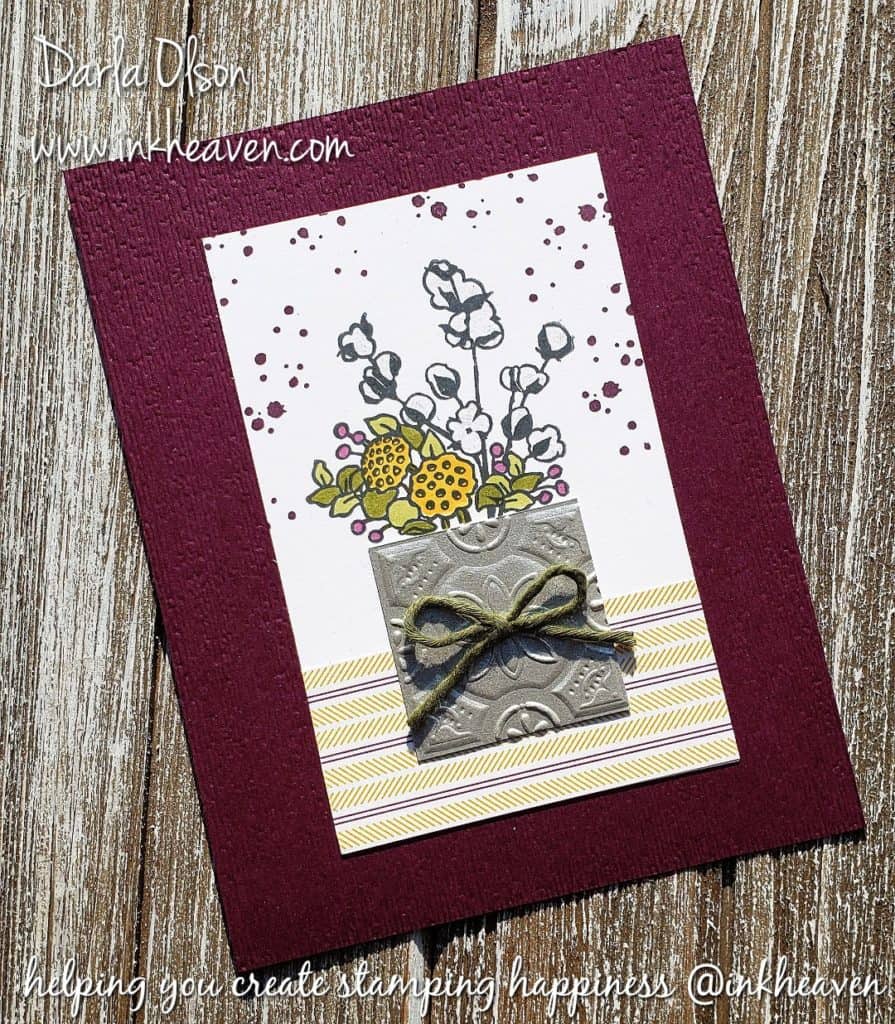
Create Vases With The Tin Tile Embossing Folder!
Vintage ceiling tin tiles and galvanized metals are hot trends in home decor! I just love how Stampin’ Up! brings current trends into our stamping! The Tin Tile Embossing Folder and Country Home Stamp Set in the 2018 Holiday Catalog are perfect examples! To learn more about the 2018 Holiday Catalog – CLICK HERE.
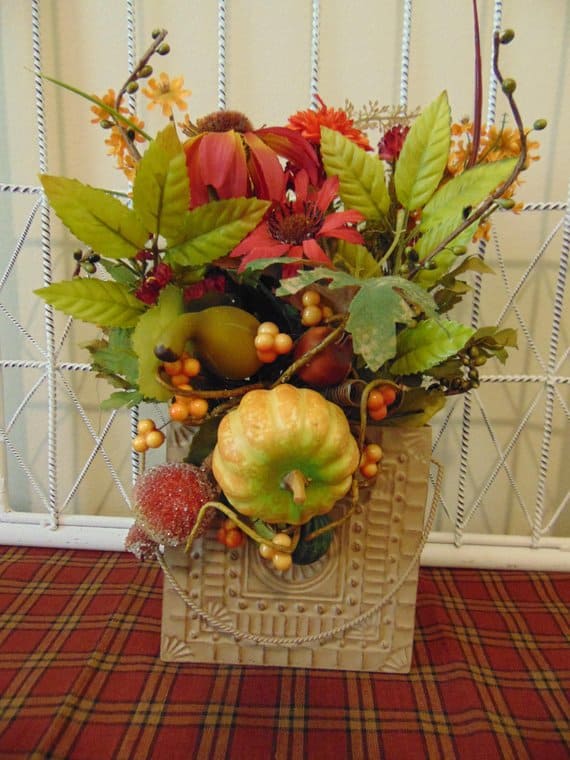
While researching ceiling tin tiles I found this fall floral arrangement. It is the inspiration for the tin tile vase on my card!
Creating the vase is easy since the squares are part of the tin tiles in the folder and all you have to do is cut them with your paper trimmer!
Supply List And Tutorial For Tin Tile Vase Card
For the Tin Tile Vase Card tutorial – CLICK HERE


Specials and Offers – CLICK HERE
This Country Home Tin Tile Vase Card was a make & take at my Grand Annual Open House events in August where I launched the 2018 Stampin’ Up! Holiday Catalog. To learn more about the 2018 Holiday Catalog – CLICK HERE
Thank you for stopping by to visit. If you have any questions, or need any help creating this tin tile vase card, please ask! I love helping you create stamping happiness for yourself and loved ones!
If you enjoyed this card and free tutorial from my open house, you might enjoy my Spirited Snowmen make & take – CLICK HERE
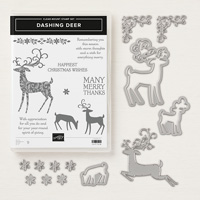
In addition, I have a free tutorial for my Dashing Deer make & take – CLICK HERE
Simple Handmade Christmas Card With Free Tutorial
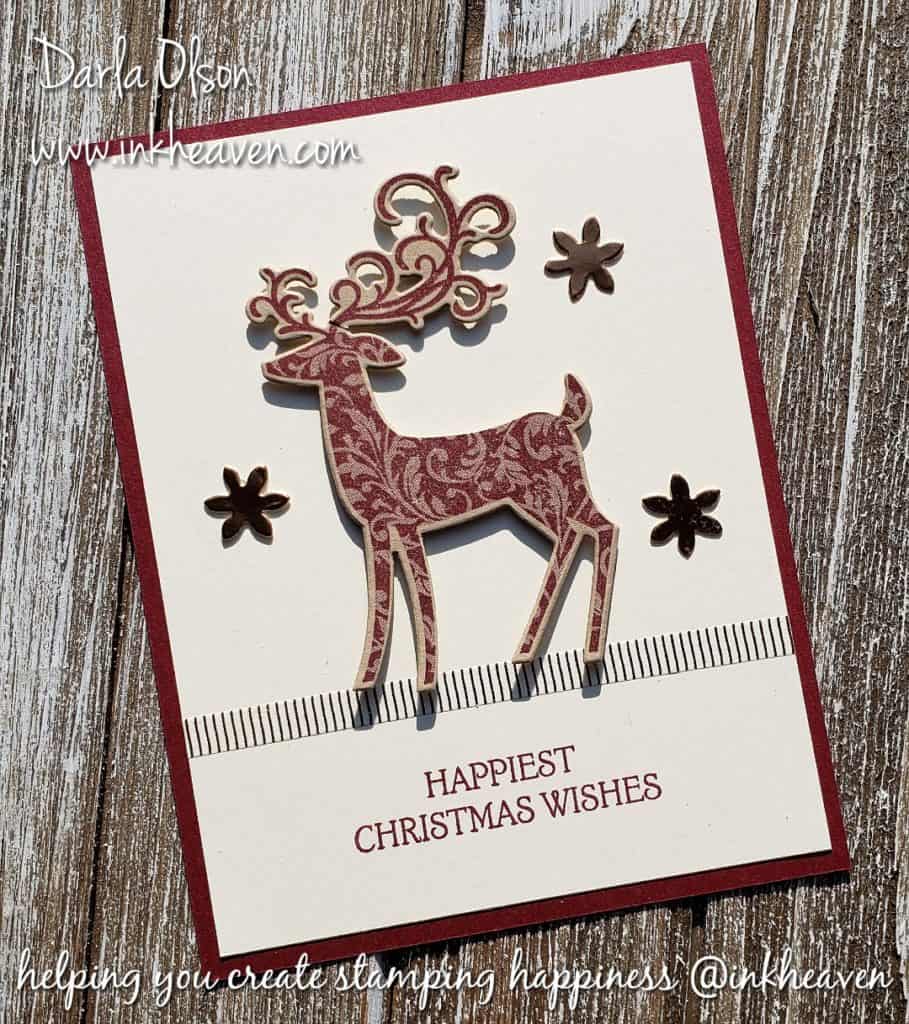
Create This Simple Handmade Christmas Card
Simple, handmade Christmas cards are key to a stress free holiday season! This simple, handmade Christmas card can be easily mass-produced. In addition, it can be easily set up in the Stamparatus to make mass-production even easier! To learn more about the Stamparatus – CLICK HERE
Simple Handmade Christmas Card Supply List And Tutorial
For the free tutorial – CLICK HERE

This simple handmade Christmas card was a make & take at my Grand Annual Open House events in August where I launched the 2018 Stampin’ Up! Holiday Catalog. To learn more about the 2018 Holiday Catalog – CLICK HERE
Thank you for stopping by to visit. If you have any questions, or need any help creating this simple handmade Christmas card, please ask! I love helping you create stamping happiness for yourself and loved ones!
If you enjoyed this Dashing Deer Christmas card and free tutorial from my open house, you might enjoy my Spirited Snowmen make & take – CLICK HERE
Cute Snowman Card Depicts Snowman Juggling Snowflakes
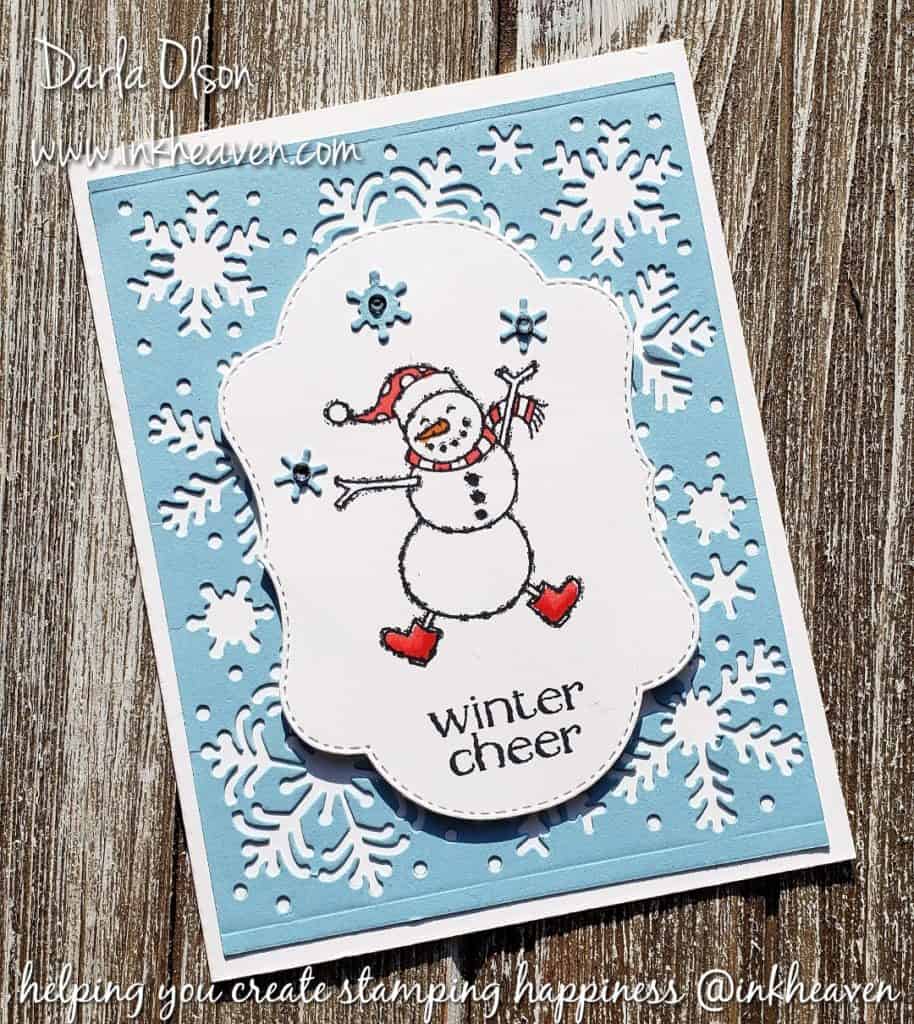
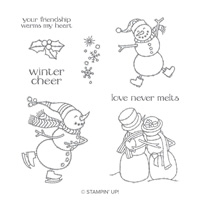
Cute Snowman Card Depicts Snowman Juggling Snowflakes
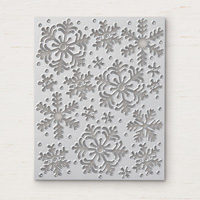
This cute snowman card was a make and take for my 2018 Grand Annual Open House. When I saw this snowman from the new Spirited Snowmen stamp set in the 2018 Holiday Catalog, I just knew he had to be juggling! Because of this, I paired him with the new Blizzard Thinlit and used snowflakes popped out of the die to give him something to juggle! As a result, this happy fella wants you to send some Winter cheer to your friends and family this year!
The 2018 Holiday Catalog goes live on September 5th! To learn more – CLICK HERE!
I wanted to share this adorable snowman card with you to give you a reminder that the Limited-time Stitched Seasons Framelit Dies are only available through 11:50 pm, August 31st . Which means that there is just one more day to get these little gems! Why does it matter? The largest stitched frame in this set of dies(largest die: 4-7/8″ x 3-3/8″) is much larger than our Layering Ovals Dies (Largest image: 2-7/8″ x 3-13/16″) and Stitched Shapes Dies (largest image 3-1/4” x 2-5/16”), which will give you more options! To learn more about the Stitched Seasons Framellits Dies – CLICK HERE.
Use these supplies* (and free tutorial) to recreate this card:
*Please note that the 2018 Holiday Catalog items are not available for purchase until September 5th! However, you will want to purchase the Stitched Seasons Framelits Dies before 11:50 pm, August 31st, 2018! Stamp Set & Framelits are limited edition and will not be seen again. SU! demonstrators may not sell them as “retired” for a year, so get them now! The bundle earns you a $5 coupon for next month. To learn more about the bonus coupons – CLICK HERE.
Tip: The Take Your Pick Tool will be available in the 2018 Holiday Catalog and is great for helping to remove the snowflakes from the Blizzard Thinlit Die.
For the tutorial – CLICK HERE.

Please note: If you missed out getting the Stitched Seasons Framelits, you can substitute the largest oval in the Layering Oval Dies.
Stitched Seasons Framelits Dies
$33.00
Specials and Offers – CLICK HERE
Thank you for stopping by to visit. If you have any questions, or need any help creating this cute snowman card with the snowman juggling snowflakes, please ask! I love helping you create stamping happiness for yourself and loved ones! If you enjoyed this post, you may also enjoy this post about using Embossing Mats to double your intricate die options (hint: the Blizzard Thinlit Die looks amazing embossed!) – CLICK HERE
Rooted In Nature Just For You Card With Free Tutorial
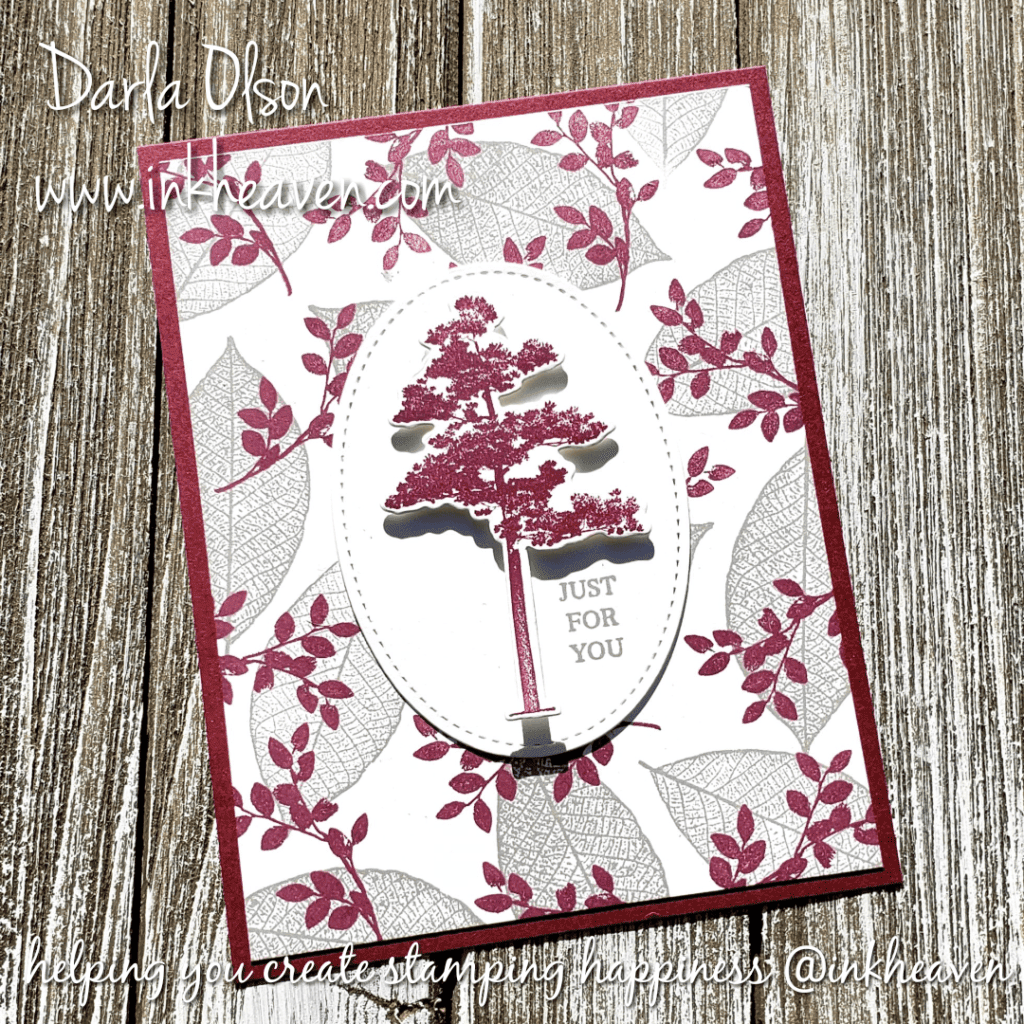
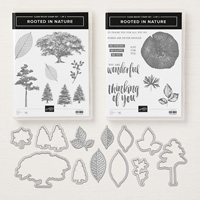
Rooted in Nature (Stampin’ Up!) Just for You Card
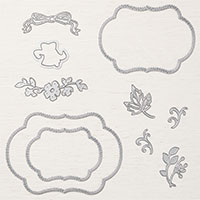
I created this card with Stampin’ Up!’s new Rooted in Nature bundle. If you like the Lovely as a Tree stamp set, you will love Rooted in Nature! Since it comes in a bundle with dies, it’s like Lovely as a Tree on Steroids! Attendees of my new catalog launch events got to create this card as a free make & take. You can see the other two make & takes HERE and HERE.
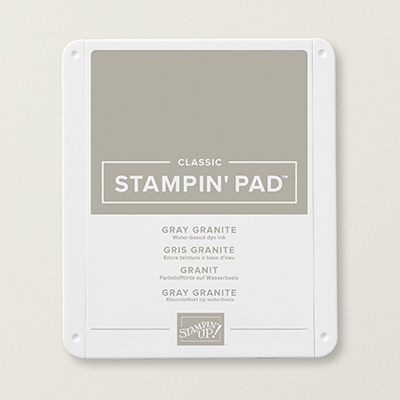
New Ink Colors Featured on the Just For You Card
This card features two of our brand new Neutrals; Merry Merlot and Gray Granite. Everyone loved that leaf in Gray Granite! To learn more about the new colors of ink added to our color line – CLICK HERE!
Stamparatus Technique Used
This card also featured a Stamparatus technique that allows you to precision stamp on pre-cut dies (or punches) using a template. To learn more about the Stamparatus and this technique – CLICK HERE
Convenient Clickable Supply List and Free Tutorial Download
To download the free tutorial – CLICK HERE.
Specials and Offers – CLICK HERE.
Thank you for stopping by to visit. If you have any questions,or need any help, please feel free to ask! I love helping you create stamping happiness for yourself and loved ones!