Easy Resist Technique Using Glossy Card Stock And Petal Palette

Easy Resist Technique using glossy card stock with Petal Palette @ inkheaven

Easy Resist Technique With Glossy Card Stock

One way to get a background that coordinates well with your card is to create it! This background is an easy resist technique using glossy card stock and Versamark ink.

Glossy card stock is a high-quality, coated card stock with a glossy finish. As a result, the surface is slick, so you do need to take care when stamping.

Supplies Needed (Images are clickable)

To create your background with this easy resist technique, you will need the following supplies:

Instructions For Technique

  1. Start with a 4″ x 5 1/4″ piece of glossy card stock.
  2. Ink up your image with Versamark ink and randomly stamp image on card stock re-inking your stamp each time. Tip: To keep stamp from slipping try to lift the stamp straight up right after stamping (the stamp will stick a bit).
  3. Heat set the Versamark inked images using the heat tool. Tip: The ink is set when the image loses it’s shine and is harder to see.
  4. Using a stamping sponge, pick up Grapefruit Grove ink and sponge over the entire surface of the card stock. Tip: Use a tissue to wipe off excess ink. Your stamped images will magically appear through the Grapefruit Grove ink!

Now that you have your background completed, you can assemble your card! To complete the card as shown, you will need the following additional supplies (images are clickable):

Happy Shopping @inkheaven
Thank you for shopping with me @inkheaven


For current Specials and Offers – CLICK HERE

Thank you for stopping by to visit. If you have any questions, or need any help, please feel free to ask! I will be demonstrating this card during a Facebook Live this month. Please like my Facebook Page (CLICK HERE) to get notified when I go live! I love helping you create stamping happiness for yourself and loved ones!

Darla Olson at inkheaven wishing you stamping happiness always

Spread the love

These Inexpensive Big Shot Embossing Mats Double Your Die Options!

The big shot embossing mats double your die options - see this great example with stampin' up! springtime impressions at inkheaven.

Use Your Dies With Big Shot Embossing Mats

The Springtime Impressions Thinlits create a gorgeous embossed background when they are embossing using the Big Shot Embossing Mats. In addition, this Springtime Impressions Thinlit pairs really well with the roses from Petal Palette. Since roses are beautiful in any color, I chose to use Stampin’ Up!’s new In Color, Pineapple Punch. To learn more about the new In Colors, CLICK HERE.

Coloring the Roses

I wanted my roses to have a soft look, so I stamped them using Smokey Slate Classic Ink. After stamping them, I colored them with the Daffodil Delight and Old Olive Stampin’ Blends. To learn more about the Stampin’ Blends and how to use them – CLICK HERE.

Watch This Video To Learn How To Use The Big Shot Embossing Mats

Additional Tip: You can soften your card stock fibers before embossing by spritzing with water before embossing. Spritz lightly using a Stampin’ Spritzer:

Spread the love

Rooted In Nature Just For You Card With Free Tutorial

Just for you card created with Rooted in Nature by inkheaven

Rooted in Nature (Stampin’ Up!) Just for You Card

I created this card with Stampin’ Up!’s new Rooted in Nature bundle. If you like the Lovely as a Tree stamp set, you will love Rooted in Nature! Since it comes in a bundle with dies, it’s like Lovely as a Tree on Steroids! Attendees of my new catalog launch events got to create this card as a free make & take.  You can see the other two make & takes HERE and HERE.

New Ink Colors Featured on the Just For You Card

This card features two of our brand new Neutrals; Merry Merlot and Gray Granite.  Everyone loved that leaf in Gray Granite! To learn more about the new colors of ink added to our color line – CLICK HERE!

Stamparatus Technique Used

This card also featured a Stamparatus technique that allows you to precision stamp on pre-cut dies (or punches) using a template. To learn more about the Stamparatus and this technique – CLICK HERE

Convenient Clickable Supply List and Free Tutorial Download

To download the free tutorial – CLICK HERE.

Specials and Offers – CLICK HERE.

Thank you for stopping by to visit. If you have any questions,or need any help, please feel free to ask! I love helping you create stamping happiness for yourself and loved ones!

Darla Olson at inkheaven wishing you stamping happiness always

Spread the love

Create a Lovely Floral Thank You Card With Dynamic Embossing Folder

Create a Lovely Floral Thank You Card With Stampin' Up! Dynamic Embossing Folder by Darla Olson @ inkheaven

Create this Lovely Floral Thank You Card

Creating this Lovely Floral Thank You Card is a snap with the Lovely Floral Dynamic Embossing Folder by Stampin’ Up! A clickable supply list and free tutorial are available at the end of this post.

Dynamic  Embossing Folders take embossing to the next level, with deeper, more detailed impressions than standard embossing folders.  Watch the video below to learn more about the Dynamic Embossing Folders by Stampin’ Up!

Watch this Video For Tips and Tricks For Using Dynamic Embossing Folder

Special Features of this Lovely Floral Thank You Card

The card shown above was a free Make & Take for my new catalog launch (to learn more about the 2018-2019 Stampin’ Up! annual catalog and learn how to receive your free copy – CLICK HERE. I wanted each guest to have a sample of the lovely Share What You Love Designer Series Paper so they could see and touch the lovely pearl sheen, so I used it to anchor the bottom of the card. In addition, I showcased a few other new products; Granny Apple Green card stock and ink and the Stitched Labels Framelits.  The straight running stitch die from the Stitched Labels Framelits is a great addition to pair with the Stitched Shapes Framelits oval!  However, you can create much simpler cards with the Lovely Floral Dynamic Embossing Folder as well (see example below).

Simpler, Alternate Thank You Card

Create a simpler version of the Lovely Floral Thank You Card with the Stampin' Up! Lovely Floral Dynamic Embossing Folder by Darla Olson @ inkheaven

Create The Lovely Floral Thank You Card Clickable Supply List and Tutorial

To download the free tutorial – CLICK HERE

Specials and Offers – CLICK HERE

I am so happy that you stopped by to visit! If you have any questions or need any help creating this card, please don’t hesitate to ask!  Feel free to leave a comment, I would love to hear from you. Thank you for allowing me to help you create stamping happiness for you and your loved ones.

Darla Olson at inkheaven wishing you stamping happiness always

Spread the love

Lilypad Lake Stampin’ Up! Card Idea Using Masking Technique

Lilypad Lake, Stampin' Up! thinking of you handmade card using masking techniue created by Darla Olson @ inkheaven

Create a Beautiful Scene With Lilypad Lake Using Masking Technique

Lilypad Lake stamp set by Stampin’ Up! is perfect for creating peaceful lake scenes.  Using the masking technique, you can make the lilypads in this stamp set appear to be floating in the water. Masking is an easy technique for placing images in the foreground to create depth to a one-layer card.

How to Create a Mask for the Masking Technique

Stamp the image you want to remain in the foreground on a piece of scrap paper (if you use this you will need to use Tombow Liquid Glue), a Post-it note (if you use this be sure part of your image is on the sticky area), or on Post-Tape (my personal favorite) CLICK HERE to purchase the Post-it Tape. After the you have stamped the image, cut the image out. Tip: You may need to cut inside the lines to get good coverage.  However, for this card, that will not be necessary, just cut as close the line as possible. Next, you will stamp the image on your card front and place your mask over the image. After this, stamp the image that you wish to appear behind your masked image over the top of your mask. Finally, remove your mask. That’s it! You have just used the masking technique!

Clickable Supply List for my Stampin’ Up! Store and Tutorial

This Lilypad Lake card idea was a Make & Take at my 2018 New Catalog Launch. For more information about the 2018-2019 Stampin’ Up! Annual Catalog and how to receive you own copy, CLICK HERE. To download the  Lilypad Lake card idea Tutorial, CLICK HERE.

Please note: The Stampin’ Blends will not be available for purchase until sometime mid-June. Item numbers are listed on the tutorial.

Specials and Offers – CLICK HERE

Step it up With LayeringHere is a similar card idea that is stepped up with layering using the Lakeside dies from the bundle and save!

Stepped up version with Lakeside Dies Stampin' Up! @inkheaven

I am so happy that you stopped by to visit! If you have any questions or need any help creating this card, please don’t hesitate to ask! Comments are welcome. Thank you for allowing me to help you create stamping happiness for you and your loved ones.

Darla Olson at inkheaven wishing you stamping happiness always

Spread the love

The Stampin’ Up! 2019-2021 In Color Collection


Each year Stampin’ Up! introduces five new colors to our Collection to keep our line up-to-date with current trends. Here is a little sneak peek of the 2019-2021 Collection!

2019-2021 In Color Collection Sneak Peek

The 2018-2020 Stampin’ Up! In Color Collection

The 2018-2020 collection is a bright and cheerful collection and will be available for two years.  In addition, the new collection is available in ink pads, markers, card stock, and designer series paper. Plus, you can purchase the ink pads in a bundle at a 10% discount! To purchase the discounted bundleCLICK HERE!

To see an easy, monochromatic card in Blueberry Bushel CLICK HERE

The 2018-2020 Stampin' Up! In Color Collection
 

Color Combo Downloads For The Revamp and 2018-2020 Collection

Stampin' Up! color coach for the in color collection.

Click here to download this Stampin’ Up! color combo chart for the 2018 – 2020 collection!

Click here to download this Stampin’ Up! color combo for the new colors in the revamp!

Stampin’ Up! Color Revamp

color revamp

Stampin’ Up! does a color update every three to five years. This year they changed many of the core colors so it is a major revamp! As a result of the  revamp we:

  • 27 of the existing core collection were kept 
  • 13 of the core collection were discontinued
  • 10 new were added to the core collection 
  • 6 returning In Colors were also added to the core collection 

Here are the ten new core with direct links to my online store for your convenience:

Here are the six returning colors with direct links to my online store for your convenience:

 
Happy Shopping @inkheaven
Thank you for shopping with me @inkheaven

Watch This Video To Learn More About The New Design

As part of the color revamp, Stampin’ Up! redesigned the ink pads! Learn more about the new ink pad design by watching the following video:

Thank you for stopping by to visit (And making it to the end of this long, but informative, post)! If you have any questions, please don’t hesitate to ask. Feel free to leave your questions and comments below. Thank you for allowing me to help you create stamping happiness for you and your loved ones.

Darla Olson at inkheaven wishing you stamping happiness always

Spread the love

Clean And Simple Card Idea With Love What You Do

A clean and simple card idea that is perfect for the beginning stamper created with the Love What You Do, Stampin' Up! by Darla Olson @inkheaven

Easy, Clean and Simple Card Idea With Love What You Do

It’s complicated.

How many times have you answered a question with those two words? Sometimes, I just want things to be simple.  I think this was my mood when I designed this card. I’ve been preparing for my new catalog launch (you can learn more about that by CLICKING HERE). After a few weeks of creating cards for Make & Takes and display boards, I think I just wanted something easy. Which ultimately lead to this clean and simple card idea using the Love What You Do stamp set from Stampin’ Up!

Great Card for the Beginning Stamper

This is a great card for the beginning stamper as it uses minimal supplies and it isn’t complicated! (It’s also great for the experienced stamper!) This card is in Blueberry Bushel Classic Stampin’ Up! Ink and Tuxedo Black Memento Ink. However, you can create this card in any color combined with Tuxedo Black Memento Ink.

A few How-to Notes for the Beginning Stamper

The background for this card is done with repeated, random stamping of the dot image. In addition, this image is stamped off before stamping it on the card. Stamping off is a simple technique where you  ink up the stamp and stamp it on scratch paper first to reduce the intensity of the ink.  Next, add the sentiment and flower image in Tuxedo Black.

Create this Clean and Simple Card using this Clickable Supply List

Please note: The Love What You Do stamp set is an early release from the upcoming new annual catalog. It is currently available in three exclusive bundles that include free product.  In addition, these exclusive bundles with free product are only available until May 31st.  Learn more about the bundles by CLICKING HERE.  After May 31st, the new catalog will go live and you will be able to purchase products individually. To learn more about the annual catalogs, CLICK HERE.

Specials and Offers – CLICK HERE

I am so happy that you stopped by to visit! If you have any questions or need any help creating this card, please don’t hesitate to ask!  Please feel free to leave your questions and comments below. Thank you for allowing me to help you create stamping happiness for you and your loved ones.

Darla Olson at inkheaven wishing you stamping happiness always

Spread the love

Vermont State Police Graduation Card Using Waterfront Stamp Set

Vermont State Police Academy Graduation Card Using Waterfront stamp set by Darla Olson @inkheaven

Graduation Card Created With Waterfront Stamp Set (& More)

Hello stampers! It’s been awhile since I have been commissioned to do a special card. However, I was recently asked to do a graduation card for a Vermont State Police Academy Graduate. After doing a little research, I discovered that they graduate in uniform. Consequently, I started to panic just a little! My “go to” for graduation cards is to coordinate the school colors with a mortarboard and tassel. Plus, I will incorporate the class motto if I can find it. In any event, that was not an option this time! So, I did a little more research focusing on the Vermont State Police rather than just the Academy.  Thankfully, I found inspiration in the Vermont State Police Shoulder Patch and logo. You can see the patch and learn more about the design by CLICKING HERE.

How I Used The Patch to Inspire the Graduation Card Color Combo

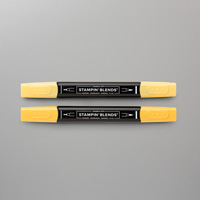
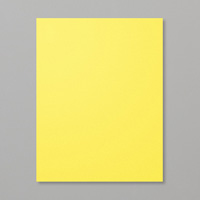
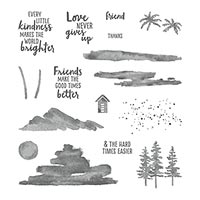
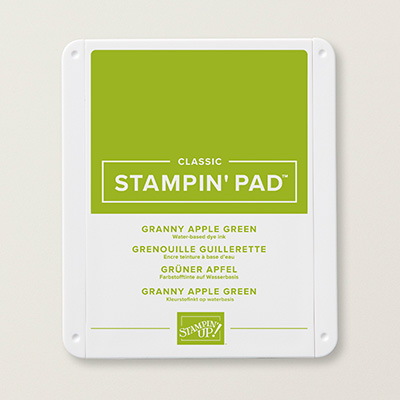
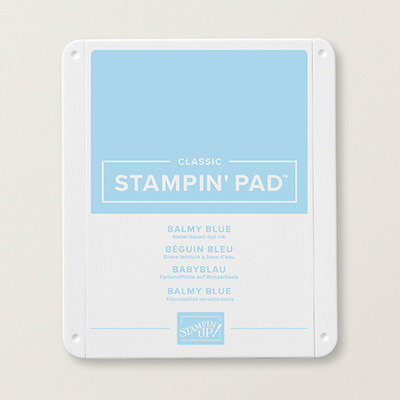
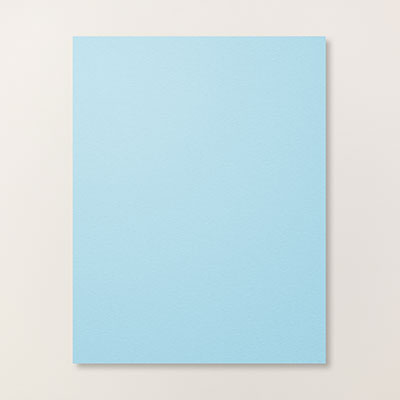
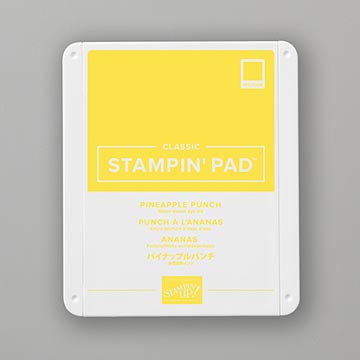
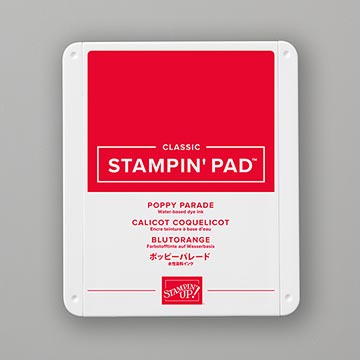
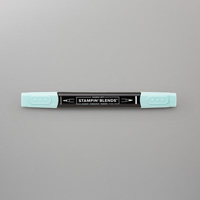
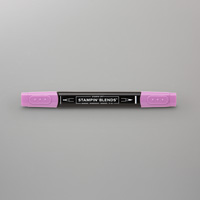
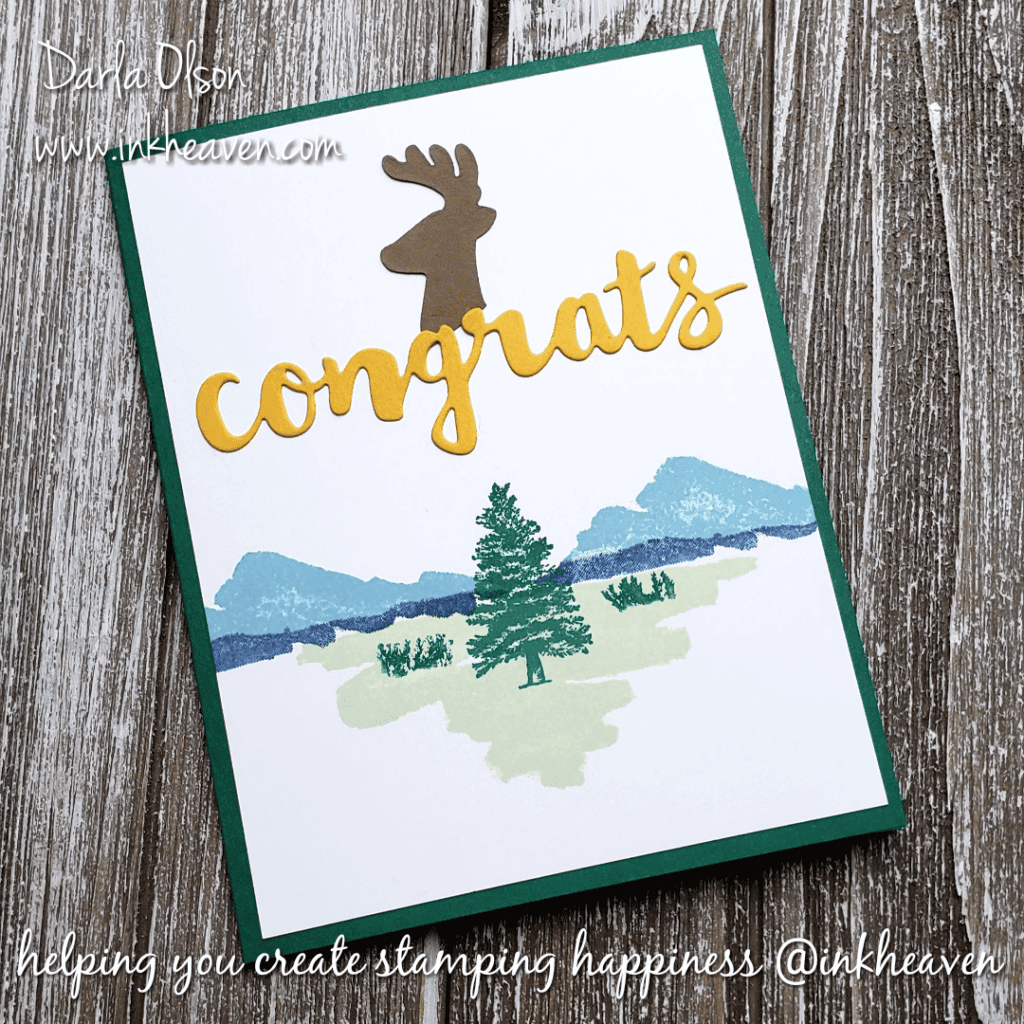
As I kept studying the patch and logo, the Waterfront Stamp Set kept coming to mind,  Given that, I pulled the set out and started pondering how to use it.  Initially, I thought I would go with creating the badge or patch. However, the more I thought about it, I decided that a looser, more relaxed interpretation would be better. This lead me to using Shaded Spruce (one of our new colors) as the base color for my graduation card and choosing Crushed Curry for the Congrats and the year (which I put inside the card – see below).  This left me with just choosing colors for the scenery in the badge. As luck would have it, we have a new blue called, Balmy Blue that I thought would work great for the mountains along with Night of Navy. In addition, we have another new color called, Soft Sea Foam that coordinates perfectly with Shaded Spruce.  Lastly, with the color combination chosen, all that was left was to decide the layout. Please note – the new colors referenced will be available for purchase on June 1st!

How I used the Patch to Inspire the Graduation Card Final Layout

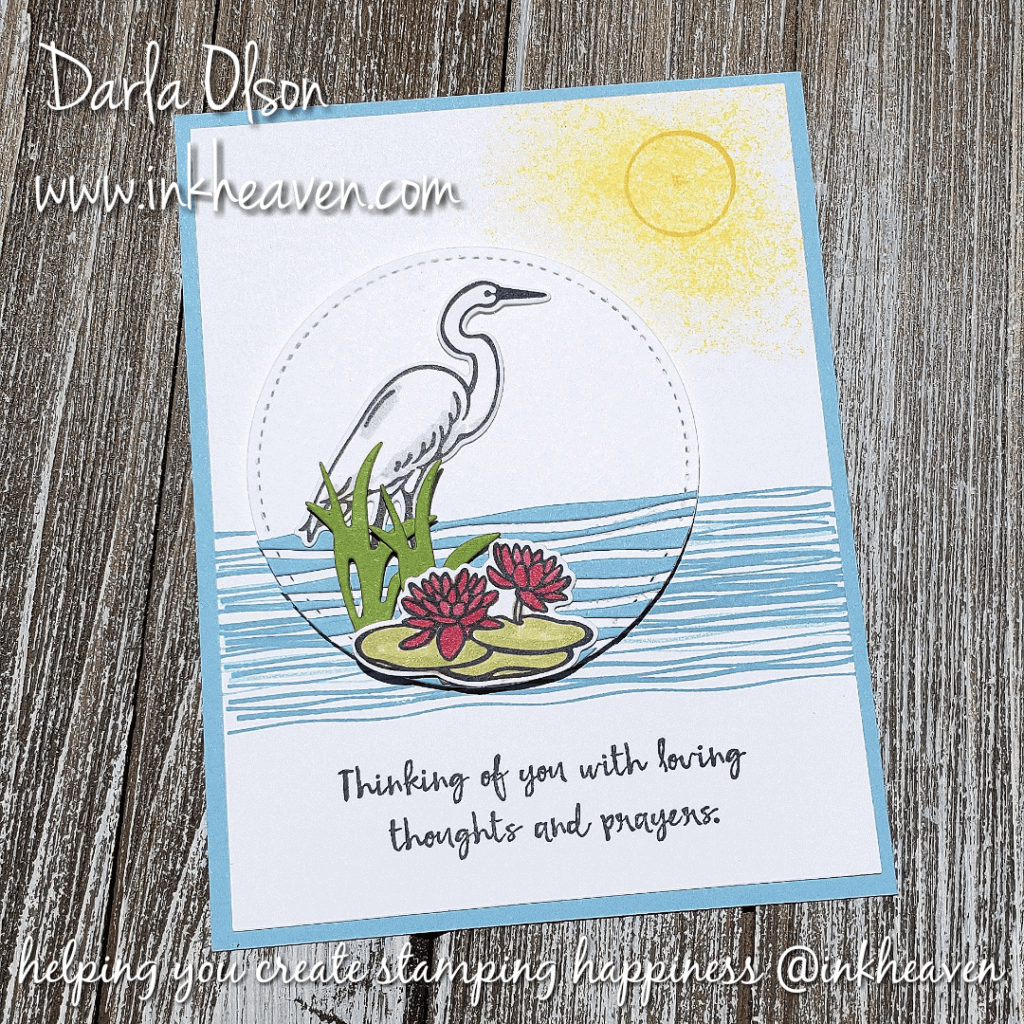
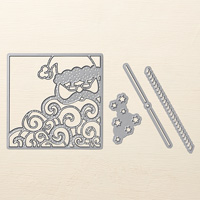
For the layout, I decided to start with the mountain scene and go from there.  I stamped the Soft Sea Foam with a stamp from the Waterfront stamp set first.  Then, I added the tree in Shaded Spruce.  Since the trees in the Waterfront stamp set are grouped together and are a little sparse, I opted to use the single, fuller tree from Rooted in Nature instead.  After adding the tree, I added the mountains. To recreate the look of the mountains in the logo, I first inked up the mountain in Balmy Blue. Secondly, I inked up the long narrow image in Night of Navy and stamped that directly on the mountain stamp.  The third and last step was to stamp the mountain(s) above the Soft Sea Foam grass and next to the tree.  Next was deciding where to put the congrats. With the congrats being a die, I was able to move it around to help me decide where to put it. Ultimately, I liked it best at the top. However, it still didn’t seem quite right.  This was when I decided that adding the deer head would complete the layout. For this I chose the deer die from Santa’s Sleigh (which is retiring and you can learn more about the retiring or discontinued items by CLICKING HERE). I opted to use Soft Suede card stock for the deer and just trimmed the head off the body with the paper snips. Please note – the Waterfront stamp set, Rooted in Nature stamp set will be available for purchase June 1st.

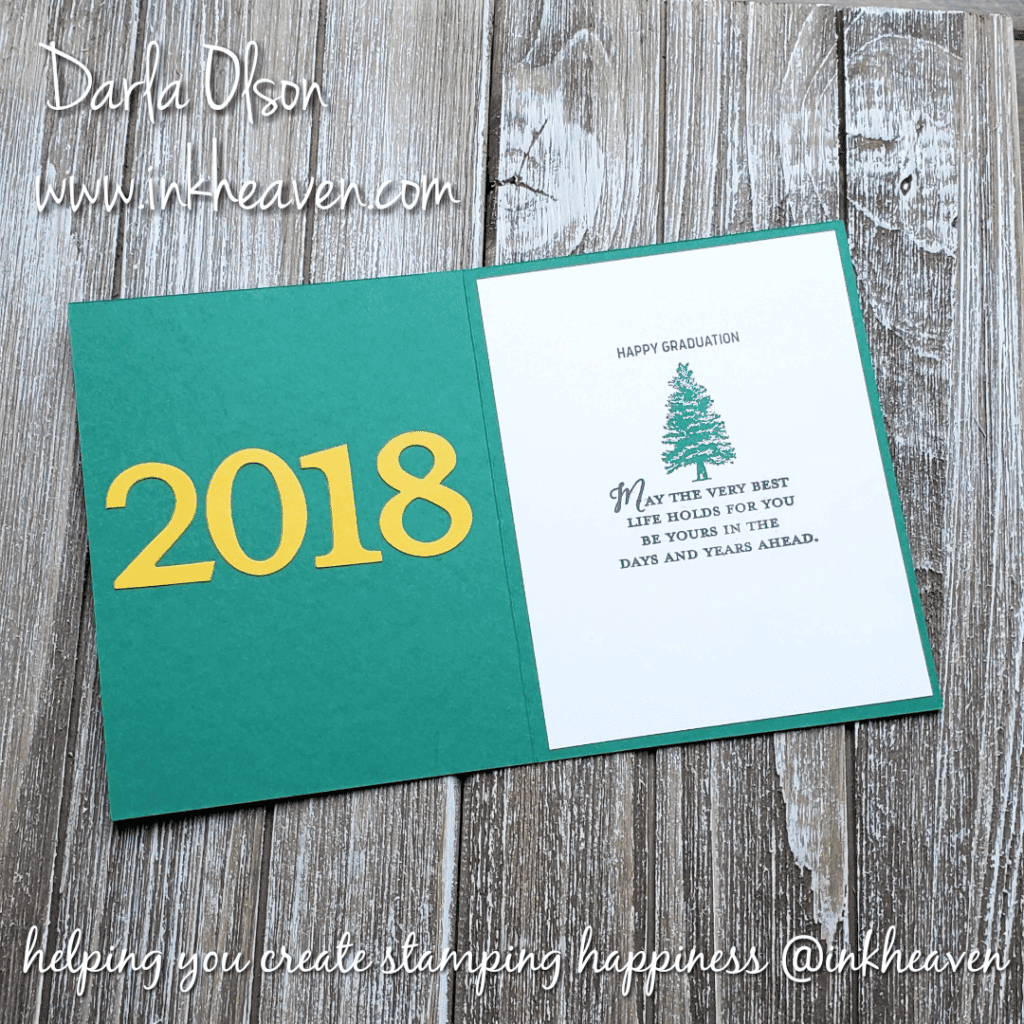
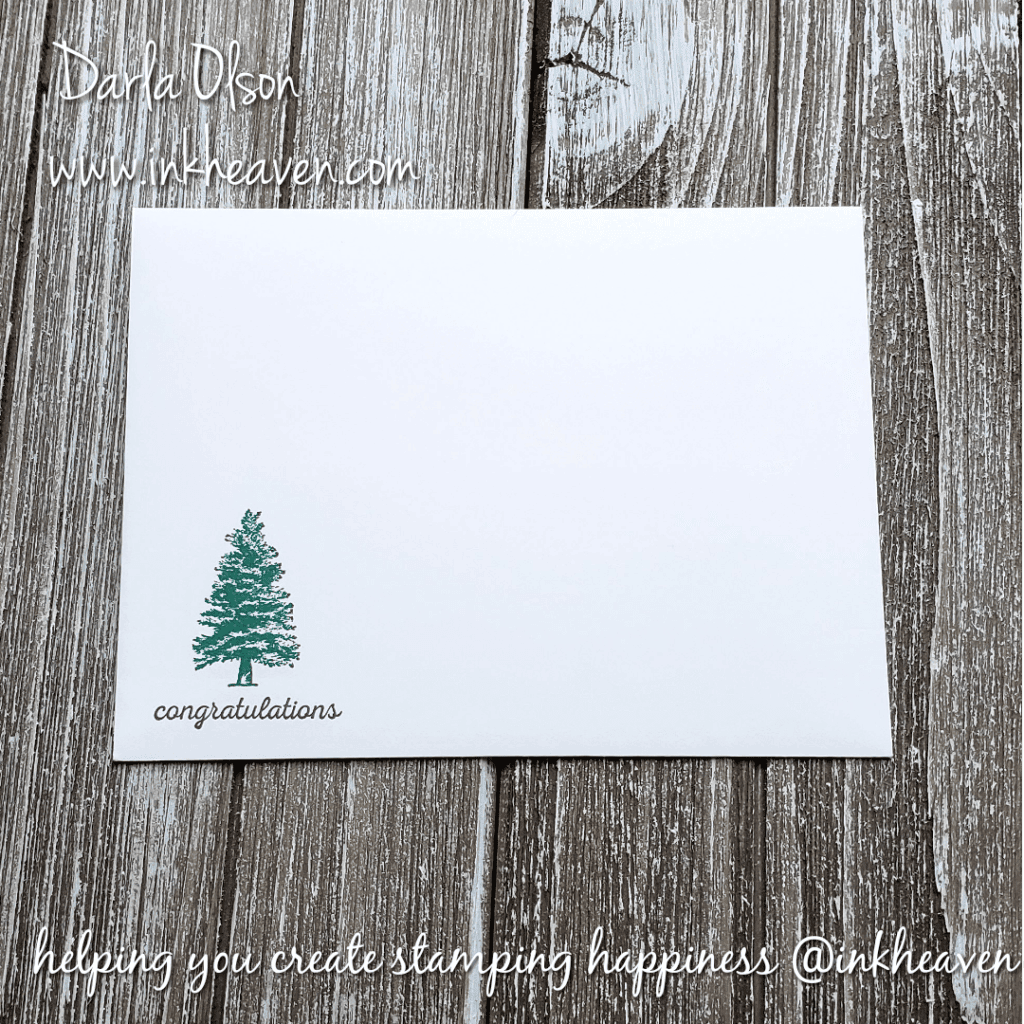
The Inside of the Graduation Card and Matching Envelope

Here is the inside of the completed card (Please note that I used discontinued dies for the numbers and a discontinued stamp set for the sentiment.  The Happy Graduation sentiment is from the new  Itty Bitty Greetings stamp set and will be available for purchase June 1st):

Inside of graduation card

I also decorated the envelope (Please note – the congratulations sentiment is from the new Itty Bitty Greeting stamp set):

Matching envelope for graduation card

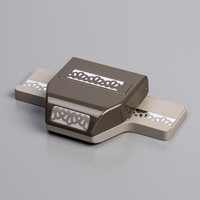
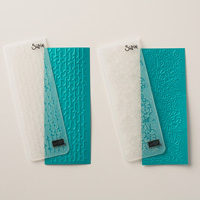
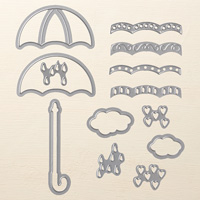
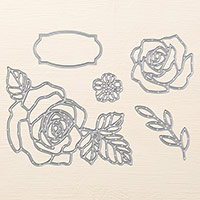
Clickable Images for Available Dies Used (Please note that the Santa’s Sleigh Dies are only available while supplies last or until May 31st, whichever occurs first):
I hope you enjoyed seeing how this graduation card came together using the Vermont State Police logo for inspiration! Please feel free to leave comments below, I would love to hear them!
I am so happy that you stopped by to visit! If you have any questions or need any help creating cards, please don’t hesitate to ask! T  Thank you for allowing me to help you create stamping happiness for you and your loved ones.
Darla Olson at inkheaven wishing you stamping happiness always
Spread the love

Adorable Sending Hedgehugs Card With Free Tutorial

Adorable sending Hedgehugs card with free tutorial by Darla Olson @ inkheaven

Create and Send this Bright and Airy Hedgehugs Card

Usually, people who need a hug, need their spirits lifted. This bright and airy Hedgehugs card is sure to lift the spirits of anyone who is in need of hug!

This card is one of three from my class featuring the Hedgehugs stamp set. Since a couple of items on this card are on the retiring list, I thought that I would share it with you. Thankfully, the stamp set is sticking  around for awhile, but the Lovely Words Framelits is on the retiring list. Sadly, the Delightful Daisy Designer Series Paper is already sold out. (To see the entire list of what is retiring – CLICK HERE). However, if you would like to create this particular card, I do have a few class packets available that include this cheerful, daisy paper! To learn more about the class – CLICK HERE.

Clickable Supply List and Suggested Alternate

Please note that I have included an alternate designer series paper in this list. The Naturally Eclectic Designer Series Paper is also bright and airy. I personally recommend the Night of Navy with the dots. However, other sheets will also work but may require you to change to a different color card stock and ribbon.

Specials and Offers – CLICK HERE

I am so happy that you stopped by to visit! If you have any questions or need any help creating this Sending Hedgehugs card, please don’t hesitate to ask! To download the tutorial – CLICK HERE.  Thank you for allowing me to help you create stamping happiness for you and your loved ones.

Darla Olson at inkheaven wishing you stamping happiness always

Spread the love

Stop the Decline of the Thank You Card with this Beautiful Card!

Stop the decline of the thank you card with this beautiful card by Darla Olson @inkheaven

Sadly, the etiquette of sending a thank you card is in decline.

It is amazing and sad how often the thank you card goes over-looked.  How many times have you given a gift, volunteered your time, or gone out of your way for someone only to have it go unacknowledged?  Doesn’t it make you feel unappreciated?

Unfortunately, the rise of texting, social media, etc. has contributed to the decline  of the thank you card. Many people have resorted to sending a quick thank you via text, social media, etc. Additionally, there are some today who advocate for good etiquette to be modernized to include the digital thank you.

While a digital thank you is nice, it really does not replace the hand-written thank you note or card. Nothing shows appreciation more than someone taking the time to sit down and hand-write a thoughtful thank you note to acknowledge another’s efforts.

This card was a make and take at my Open House in March and is a quick and easy card to make and send to show your appreciation.

Create this card using this clickable supply list and tutorial.

Please note that Pink Pirouette is being discontinued and is only available while supplies last. For more information and a complete list of retiring items – CLICK HERE.

Specials and Offers – CLICK HERE

Help stop the decline of the thank you card! CLICK HERE to download the tutorial and make a stash of thank you cards today! Thank you for visiting me today and allowing me to help you create stamping happiness for you and your loved ones.

Darla Olson at inkheaven wishing you stamping happiness always

Spread the love

Use This Easy Card Sketch To Create Cards For Any Celebration

Easy card sketch for any celebration by inkheaven

Use an easy card sketch to create cards for any celebration.

Creating wow cards can be just as simple as using an easy card sketch. The wonderful thing about card sketches is that they can be used over and over again! All that is necessary is to switch out the inks, papers, stamps, and accessories, and keep the basic design.

This sketch is one of my go-to favorites. It has a centered focal point and it is anchored at the bottom.  In addition, I love using hearts in my focal points like the one above from the Sweet and Sassy dies. Sadly, these dies are being retired and are only available while supplies last. To learn more about the retired list CLICK HERE. However, any shape can be used with this design; stars, circles, ovals, squares, and more! CLICK  HERE to see another card that uses the same basic design but looks very different. It also uses the Sweet and Sassy dies but it is anchored with images at the bottom of the heart .

Create this card using this clickable supply list and tutorial.

Several of the supplies used to create this card are retiring. Consequently, you will want to place your order as soon as possible since these supplies will only be available while supplies last. These are the items that are retiring: Picture Perfect Party Designer Series Paper, Sweet & Sassy Framelits Dies, Sweet Sugarplum Cardstock, Glitter & Clear Epoxy Shapes, and the Love Mini Tinsel Trim. Additionally, the Party Pandas stamp set was from Sale-a-bration and is no longer available. However, I do have a couple of extra sets for sale – CLICK HERE.  Also, the Celebrate You Thinlits Dies were a Sale-a-bration item and won’t be available again until the new catalog makes its debut on June 1st! To learn more about our catalogs and how to get your own copy, CLICK HERE.

Specials and Offers – CLICK HERE

Have fun using this easy sketch to create this card and many other WOW cards. CLICK HERE for your free tutorial. Thank you for visiting me today and allowing me to help you create stamping happiness for you and your loved ones.

Darla Olson at inkheaven wishing you stamping happiness always

Spread the love

It’s Time To Say Good-bye, But I Think Good-byes Are Sad

Good-bye to all the retiring items - download the retiring lists @ inkheaven.

It’s Time to Say Good-bye to Some Fun, Crafty Tools

“It’s time to say goodbye, but I think goodbyes are sad and I’d much rather say hello. Hello to a new adventure.” Ernie Harwell

It’s time to say good-bye to some fun, crafty tools from Stampin’ Up! once again! Good-byes are sad and like Ernie Harwell, I’d much rather say hello. Hello to a new adventure! Luckily, we will be saying hello to a new adventure with a new catalog soon! Meanwhile, there are a few things you might not want to say farewell, to! Download the retiring lists and don’t miss the opportunity to get the fun, crafty tools before they are gone! Just click the images below to download and save the retired lists for the 2017-2018 Annual Catalog and the 2018 Occasions Catalog.

2018 Occasions Retiring List 2017-2018 Annual Catalog Retiring List

What You Need To Know About The Retiring Items

  • Promotion dates: April 9–May 31, 2018 beginning at 1:00 PM (MT)
  • There is no minimum purchase required to participate in this promotion.
  • Retiring items may be added to all order types: demonstrator, workshop, customer, and online.
  • All retiring items are only available while supplies last and will be discontinued after May 31.
  • Due to high demand for retiring stamp sets, retiring stamp sets will be guaranteed available until May 25; all other products are not guaranteed and are only available while supplies last.
  • Retiring items are eligible for Stampin’ Rewards with qualifying orders.
  • Retiring host sets can only be purchased using Stampin’ Rewards from a qualifying party.

Special Information Regarding Retiring Inks!

Whenever colors are retired, there is always some confusion about the status of various products in those colors. We wanted to be sure that our demonstrators and customers have a chance to buy retiring ink pads and refills before they are gone. We have worked with our vendors to ensure that we have a period of guaranteed stock before the retirement date. This means that even if an ink pad/refill goes on backorder during that guaranteed time, those orders will be fulfilled.

However, after that guarantee date has passed, those products in retiring colors are available while supplies last. Please see the chart below that details this. It also shows how other products with retiring colors will be handled.

Retiring Color(s) Guarantee Chart

Clickable links to some of my favorite retiring items

Happy Shopping @inkheaven
Thank you for shopping with me @inkheaven


I can’t believe that the Sweet & Sassy Framelits are going! Hearts are a staple!

Rose Wonder and the Thoughts and Prayers are such wonderful sympathy sets, I hate to see them go!
I have recently had so much fun with the Weather Together, Umbrella Framelits, and the Tutti-Frutti Sequins that I just can’t stand to say good-bye! CLICK HERE to see my fun project!
Thank you for stopping by to visit me today. Be sure to stop by again, I will be sharing more fun projects with items from the retiring lists!
Darla Olson at inkheaven wishing you stamping happiness always
Spread the love

How to Create a Rainbow with the Tutti-frutti Adhesive Backed Sequins

Learn how to create a rainbow with sequins @ inkheaven

Create a Colorful Rainbow with Tutti-frutti Sequins

Sequins are a hot embellishment trend for 2018.  I wrote about that (click here) when I was preparing this card and tutorial for my Facebook Live earlier in the year.  I am finally getting around to posting the card, tutorial, and my Facebook Live (in the raw) video for you!

The Tutti-frutti Sequins are adhesive-backed which makes creating the rainbow  a snap. You can download the tutorial (click here). Watch my Facebook Live (in the raw) video below the clickable supply list.

Clickable Supply List for the Brighter Days Panda Card

If you missed out on Sale-a-bration and earning the Party Pandas set for free – I have two stamp sets available for sale in my shop (click here)

Here is a clickable supply list for your convenience:

Facebook Live Video (In the Raw!)

Thank you for visiting me today and allowing me to help you create stamping happiness for you and your loved ones.

Darla Olson at inkheaven wishing you stamping happiness always

Spread the love

Amazing Love Card Conveys The Easter Message

Amazing Love Easter Card

Amazing Love Easter Card

I created this Amazing Love Easter Card as a make & take for my Sale-a-bration Open House. For more information about Sale-a-bration, CLICK HERE.

While I enjoy all the fun things that we do to celebrate this holiday (decorating eggs, egg hunts, baskets, etc.), I prefer to have my Easter cards to be more about why we celebrate it in the first place.  With that in mind, I purchased the Hold on to Hope Bundle to have on hand for my cards. Be that as it may, I have to admit that it was never my intention to use three different stamp sets for my card. Ordinarily, I feature one stamp set and occasionally pair it with a greeting set.  However, as I thought about the holiday and what it represents, the song Amazing Love by Chris Tomlin popped into my head. Consequently,  I realized that the Amazing You stamp set was the perfect choice to pair with the Hold on to Hope stamp set to convey the message that I was looking for!

The Song That Inspired My Easter Card

I’m forgiven because You were forsaken
I’m accepted, You were condemned
I am alive and well, Your spirit is within me
‘Cause You died and rose again

I’m forgiven because You were forsaken
I’m accepted, You were condemned
I am alive and well, Your spirit is within me
‘Cause You died and rose again

Amazing love, how can it be?
That You, my King would die for me?
Amazing love, I know its true
It’s my joy to honor You
In all I do, I honor You

by Chris Tomlin

If you have not heard the song, you can listen to it in this video:

Putting it all together to create the perfect Easter Card

Now that I had inspiration for my Easter card, it was time to work on my layout.  The Crucifixion wasn’t pretty. For this reason, I did not want my card to be ornate, so I chose the Wood Textures paper to use for the cross.  In addition, I wanted to have something that would represent the joy of the resurrection, so I used the rays of light stamp from the Amazing You set with Daffodil Delight and a hint of Wink of Stella. Furthermore, I wanted the purple robe to be represented as well so I chose the Fresh Fig ribbon.  As the elements of the card came together, the next challenge was how I was going to incorporate the word, love.  I finally settled on the sentiment, “I just love you”, from Petal Palette.  For the tutorial, complete with measurements, directions, and supply list, CLICK HERE.

Clickable Supply List for the Amazing You Easter Card

For your convenience, here is a clickable supply list:

Creating this  Amazing Love Easter Card was exciting and fun and I am thrilled to be able to share it with you to help you create the perfect card that conveys the message of Easter!

Darla Olson at inkheaven wishing you stamping happiness always

Spread the love

An Ode to Dr. Suess on his Birthday. Happy Birthday Dr. Suess!

Happy Birthday, Dr. Suess! Ink, Ink, Ink! by Darla Olson @inkheaven

Happy Birthday, Dr. Suess!

Dr. Suess had a fabulous way of communicating with words. As a result, he had a great influence on my love for reading and words. In addition to loving words, I also love color! Sometimes, I wonder if my love of color is directly connected to my love of words.  After all, words and color are both forms of communication. When you pair the two together, it’s powerful.

When I was preparing for this post, I discovered that he wrote about colors! I did not know this and will have to get a copy and read it. I want to know how he presented color with his wonderful mastery of words!

Several years ago, I wrote up a little poem about ink to honor Dr. Suess on his birthday. It’s my interpretation of how he would have written about ink. I wonder if will be anything like his book on color?

Ink, Ink, Ink! An Ode to Dr. Suess

Oh, the things
you can ink up

if only you try!

You can ink up
in yellow
or ink up in blue

You can ink up
a horse
or ink up a sky
with clouds floating by

Oh the things
you can ink up
any thing that you wish

Ink up in bright colors
ink up at night
ink up on a long trip

Oh, the wonder of
ink, ink, ink!
You can ink up a bouquet
to celebrate a birthday!

Oh the things
you can ink up
if only you try!

by Darla Olson

Ink Up A Color Combo For Dr. Suess

 I tried to match Stampin’ Up! colors to the ones represented on the cover of Dr. Suess’s book of colors.  Pick two or three of them to help you convey a message on a handmade card today!
Spread the love