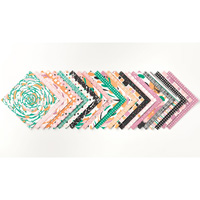
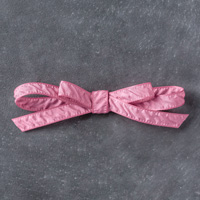
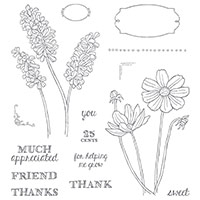
Sending Love Sweet Mailbox

Video Tutorial for The Sending Love Suite Mailbox and More with Darla Olson, Stampin' Up! Demonstrator at Inkheaven
The Sending Love Suite Makes A Sweet Mailbox!

The Sending Love Suite Makes A Sweet Mailbox! (Video Tutorial)

Hello Stampin’ Friends!
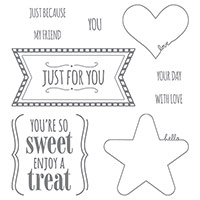
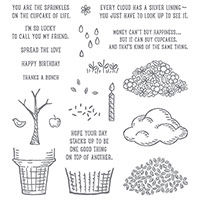
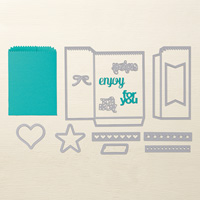
The Sending Love Suite from Stampin’ Up! was just begging to have a sweet little mailbox! I have had a this mailbox project on my Sweethearts board on Pinterest for the longest time and when I bought the Sending Love Bundle I knew I wanted to take a stab at it! I bought this bundle specifically to do fun little things like this! It’s perfect for fun little cards and sweet treat projects!
I did a FB Live Video sharing this project and several other fun little projects that you can check out here:

Just some notes regarding the mailbox project:

  • I did test out the Banner Framelits and the smallest one is perfect! I will be sharing my tips for that on my FB Live on Thursday evening, January 26th at 7 p.m.!
  • Changing the Whisper White from 3″ to 5″ for the mailbox and scoring at 1″ at each end works way better than the instructions I followed for my video!
  • I also tested my idea for gluing 2 arrows back to back – that works great as well!
Like my Facebook Page here so you don’t miss any of my stamping videos for more fun little projects like this!
If you don’t have a demonstrator, I would love to be your demonstrator and help you to create, have fun, and repeat! Purchase your Sealed With Love Bundle at www.darlaolson.stampinup.net so you can have fun creating your own sweet little mailboxes (and take advantage of Sale-A-Bration, learn more here)!
Thank you so much for stopping by to create and learn with me.

Dragonfly Dreams Card Meets Tie-Dyed

Handmade card created with Dragonfly Dreams by Darla Olson at Inkheaven
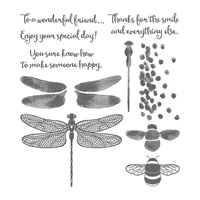
Dragonfly Dreams

I love dragonflies. I have been fascinated with them since childhood. Between their unique flying ability and the iridescent shimmer of their wings in the sunshine they are intriguing and dreamy!

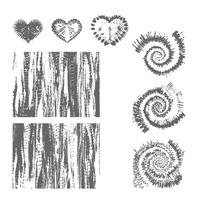
This card features Dragonfly Dreams, but the real secret is the Tie-Dyed background. I wanted to catch the shimmer of sunlight for a background and I had purchased Tie Dyed expressly for it’s capability to produce unique backgrounds, so I pulled it out for this card and got to playing! I originally created this card for my hubby’s birthday, but it was so much fun that I decided to do more for a swap. Each card turned out with a unique background.

I used a Watercolor Technique for the background. It is one of my favorite techniques for unique backgrounds! I shared a FB Live video tutorial for this technique here. This card will be in my Dragonfly Dreams class later this year and I am so excited to share it with you in class.

Every once in awhile I like to write. Usually, it’s a way to express whatever flood of emotions I am feeling. I wrote this in 2004 when my uncle passed away. Since it shares some of my feelings on dragonflies, I thought I would share it with you today.

Memories…
Of childhood
Hot summer days
Dragonflies flitting, buzzing
Wings shimmering in the sun
Fascinated, awed, slightly afraid
Following, but not too close
Happy, warm, carefree

Memories…
Like dragonflies
Flitting, buzzing in my mind
Shimmering in my heart
Fascinated, awed,
By the clarity of yesteryear,
I follow close
Happiness and warmth
Comfort me in my sorrow

By Darla S. Olson 2004

I hope you enjoyed my card and my writing. Thank you for allowing me the liberty of a lengthier post that isn’t necessarily all about stamping.

For your convenience, I have listed most of the supplies that I used creating this card below. Clicking any of the images will take you to my 24/7 online store where you can be a happy sale-a-bration shopper and get free stuff! Be a happy shopper anytime with me here at inkheaven by clicking here: www.darlaolson.stampinup.net.

Thank you so much for stopping by to create and learn with me at inkheaven!


Coming Soon! A Haunted House Near You!
What an amazing swap card created by fellow demonstrator, Katie Brandt!

I was really tempted by this Ghoulish Grunge set in the holiday catalog. Mostly because I feel that it has so much more potential than just Halloween. I really like multi-purpose stamp sets. I may decide to bite, yet. I have a little time…

Katie’s card reminded me of the Haunted Houses sponsored by the Jaycee’s that I used to frequent when I was much younger. A whole group of us would go. It was a ton of fun. Now, I think I would rather just stamp a card…

I have a couple of FB Live video’s if you would like to check them out at the bottom of this post. One is to explain how to use the stamp-a-ma-jig. Unfortunately, I had some technical difficulties and lost sound before the end – but hopefully – you can get the gist of it!

For your convenience, here is a list of most of the items she used in the creation of this card. Clicking on any of the images will take you to my 24/7 online store where you can shop to your hearts content. Thank you so much for stopping by!


How to Get Good Results Water Coloring With a Blender Pen

I created this card because…I am a delinquent daughter. Gulp! There…I said it! You heard it right! I was so busy at the end of May and the first part of June with new catalog launches and preparing for classes that I never got a Father’s Day card sent to my dad. What? I know…it’s terrible! I’ve been late before…but usually not this late! But, I am guessing that he will be tickled about getting it anyway, even if it is late!

This card was water-colored using blender pens. If you’d like to watch my video for tips on how to get good results with a blender pen head on over to my FB Page:

For your convenience, here is a list of most of the items I used in the creation of this card. Clicking on any of the images will take you to my 24/7 online store where you can shop to your hearts content. Thank you so much for stopping by!

A Fun Card For National Watermelon Day

I created this fun card in honor of National Watermelon Day yesterday! I put it together on FB Live if you would like to see the video:

For your convenience, here is a list of most of the items I used in the creation of this card. Clicking on any of the images will take you to my 24/7 online store where you can shop to your hearts content. Thank you so much for stopping by!


Background Watercolor Video Tutorial With Floral Phrases

This card was my absolute favorite of the three cards we did in my Floral Boutique Suite classes. The soft water-colored background is stunning and very easy to do! I demonstrated this technique on FB Live and if you watch it all the way to the end there is also a little tip for getting more shimmer with the clear Wink of Stella. You watch the video here:

For your convenience, I have listed most of the supplies that I used in the creation of this card below. Clicking on any of the images will take you to my 24/7 online page where you will want to add them to your cart so you can have them delivered right to your door (and earn those $5 Bonus Coupons!) Haven’t heard about those coupons? Check it out! It’s the last week to earn those coupons so don’t procrastinate! Thanks so much for stopping by!


Playful Palette Party Cone Video How-to

This fun party cone was inspired in part by the fact that this is National Ice Cream month! Originally, I just wanted to make sleeves for ice cream cones…and then it developed into the idea as using the cones as party favors. These are stuffed with a little stamping fun for a stamping event…but think of how fun they would be stuffed with little treats for any kind of party! Think birthdays, Christmas, Thanksgiving, Halloween, even May Day baskets. They would even work for weddings! How fun would it be to fill them with bird seed to fling at a wedding? The ideas are probably endless and more than I could come up with – so be sure to share any different ideas that you come up with in the comments! The rest of us would love to hear them!

These were incredibly easy to make and no template is required! To see just how easy, hop on over to my Facebook Page to view a short FB Live video.

For your convenience, I have listed most of the supplies that I used in the creation of this project below. Clicking on any of the images will take you to my 24/7 online page where you will want to add them to your cart so you can have them delivered right to your door (and earn those $5 Bonus Coupons!) Haven’t heard about those coupons? Check it out! Thanks so much for stopping by!

Helping Me Grow Shirt Fold Card

This pretty card is a swap created by fellow demonstrator, Kay Capps. It has a unique look with out too much effort; my kind of card! (I claim to be a lazy stamper!) This is called a shirt fold card and is fairly simple and straightforward:

  • Cut your designer series paper down the center
  • Fold back the each side to create the “collar”
Easy, right? Now go make one!
For your convenience I have listed most of the supplies that Kay used in creating her card. Clicking any of the images below will take you to my 24/7 online store where you may purchase the supplies you need to create your own shirt fold card. Thank you so much for stopping by!

The Deer are Playing in the Meadow

This great swap card was created by fellow demonstrator, Nena Shaw. I love how she used the Perfectly Artistic Designer Series Paper for her background, it’s perfect! Sadly, this paper was a free Sale-A-Bration reward so it is no longer available. However, you can get this same look with a fun technique called, Shaving Cream Marbling. This technique is very easy to do.

Here is what you will need:

  • Tip Top Taupe re-inker
  • Cake pan or something similar
  • Spatula
  • Cheap shaving cream
  • Whisper White card stock
  • Paper towels
The steps:
  • Cover the bottom of the pan with shaving cream
  • Add drops of ink all over randomly
  • Swirl ink with spatula (just like you would if you were baking a marbled cake)
  • Now you can lay your whisper white card stock on top of the shaving cream and press it in
  • Lift up the card stock and remove excess shaving cream with spatula 
  • Wipe off with paper towel
  • Set aside to dry
  • Stamp on it once it is dry!
Easy and fun! Make up a few while you are at it!

I hope you enjoyed this little tutorial. Supplies you will need from my 24/7 online store are pictured below, just click on any image and you will be transported right there! Thanks so much for stopping by!


How to stack up Four Scoops of Yummy Goodness!

I received this card in a convention swap last year. The creator did not put his/her name on the label so I am unable to give credit to him/her. However, I wanted to share this card because it is an awesome example of using the Masking Technique!

The Masking Technique is great for layering images, adding depth, and creating overlays!

How to create a Mask and use it:

  1. Stamp image on card stock. (Like a scoop of ice cream!)
  2. Stamp it again on a piece of scratch paper. ( I like to use post it notes – but scratch paper works if you use a bit of 2-way glue for a temporary bond!)
  3. Cut carefully around the scratch paper image, cutting just inside the lines: this will be your mask.
  4. Place the mask on top of the card stock image.
  5. Stamp another image over a portion of the mask to created layered, interacting images.
  6. Remove the mask to see the finished look.
  7. Repeat as necessary (You can create as many calorie free scoops of ice cream as you wish with this method!)
I hope you enjoyed this quick, fun little tutorial on how to stack up four scoops of yummy goodness! We are actually quite adept with the scoop at our house..a little personal factoid…my hubby works for the Blue Bunny! Very good ice cream! Yum!
This calorie free card was created with the Sprinkles of Life set (purchasing it supports RMHC and you can read more about that by clicking here). If you have never used 2-way glue, it is awesome stuff! It can create a temporary and permanent bond! Support Ronald McDonald House Charities and become a Master Scoop Stacker by visiting my online store and purchasing Sprinkles of Life today! Click on any of the product images below and you will be taken to my 24/7 online store. Thanks for stopping by!

How to Mini-Me the Mini Treat Bag Video!

For those of you who attended my Grand Annual Open House back in August and wondered how I made this smaller Mini-Me version of the Mini Treat Bag here is a Video from Stampin’ Up! that gives you a visual on how I did it.

You will notice that my right edge is more “finished.” I flipped mine and lined the teeth up and ran it through the big shot a second time to get the edges even on each side. I’m afraid my OCD did not allow for one square corner! LOL! However, I am a big advocate of doing whatever makes you happy in your crafting adventures, so I will not judge you if don’t want to follow my lead!

For your convenience I’ve included a product list of the items used to create this project below. To add any of these items to your stamping collection you may click on one of the products or the Shop Now tab above to be taken to my 24/7 online store! Thanks so much for stopping by!


The New Precision Base Plate

The new Precision Base Plate is a great addition to your arsenal of Big Shot tools if you love using detailed thinlits! It is designed to help all those details get a nice even cut. I like using wax paper as a layer over the card stock between the thinlit with mine to get them to dislodge from the thinlit easier. Here is a video from Stampin’ Up! showing how to use the new Precision Base Plate:

Shannon used the new Delicate Ornament Thinlits Dies in her presentation. This set of dies actually contains Thinlits and Framelits. The Thinlits are the dies with all the details. The Framelits are the open dies. Framelits are best used with the Magnetic Platform; the reason being that Framelits are designed to cut around your stamped images and the Magnetic Platform keeps the Framelits in place around your stamped image. To purchase the new Precision Base Plate click the Shop Now tab at the top of the page!

Happy stamping!

Wetlands Card Making Class Kit

Wetlands Card Making Class Tutorial

Wetlands card making class is now available to purchase as a kit!

Please note: This card is not part of the class. It is a convention swap that I am sharing with you to provide another idea for this fantastic stamp set!

This lovely sketched set imbues the peacefulness of the great outdoors. Includes three sentiments for several different occasions.

This class features:

  • Basic WOW to Specialty
  • Masking Tape Technique
  • Tent Card with Circle Thinlit
  • Scenic Sponging
The kit includes:

  • Pre-cut card stock for 4 cards
  • Embellishments for 4 cards
  • Supply Lists for 4 cards
  • Step by Step Directions for 4 cards
  • Photo of each card (4 photos)
The kit does not include Stamps, Accessories, or inks! (No images are pre-stamped)
The Kit price options include standard mail or priority mail. Or, you can purchase the tutorials only (which includes the supply lists).
Links to the tutorials and supply lists will be made available to you immediately upon payment. Kits will come to you via standard or priority mail depending on which option you chose.

Wetlands Class Options

Ribbons and Bows

Q&A

Q: What is your favorite ribbon bow technique?

A: Well, I’d like to say it’s a natural ability, but that wouldn’t be true! I’ve learned how to make a bunch of great bows through resources from Stampin’ Up! and my fellow demonstrators. Here are 5 of my favorite bows as well as tips for making them.

Crafting Bow Techniques by CraftyPerson

1. Two-Colored Double Bow: Layer two 18” ribbons. Layer ribbons then tie a standard bow. Before pulling the bow loops to tighten the bow, take a moment to twist the ribbon ends so they lay straight. Pull bow loops to tighten, then fan the inside bow loops out from behind the top loops.

Crafting Bow Techniques by CraftyPerson

2. Elegant Bow: Lay a 5” piece of ribbon out flat. Add a dab of SNAIL to center of ribbon. Fold in right end and adhere to center. Add a dab of SNAIL on top of ribbon end. Fold in left end and adhere to center. Add a dab of SNAIL on top of ribbon end. Place one end of 2” ribbon over center of ribbon, creating a “T” shape. Add a dab of SNAIL on top of 2” ribbon end over folded ribbon. Wrap 2” ribbon around folded ribbon until it overlaps and adheres to itself. Pull ribbon snug so it is flat, but not so tight it causes the folded ribbon to gather. Trim off excess ribbon. Press bow flat or push the ends gently to puff it up a bit. Add to card or layer on top of a ribbon strip.

Crafting Bow Techniques by CraftyPerson

3. Perfect Double Bow: Select a brad and spread prongs out flat. Begin with 18” ribbon. Use a ruler or estimate the lengths. Fold ribbon 3” from end with 3” section on top. Hold finger over folded layers 1” from fold with loop to left. Fold long end towards your finger to create 1” loop on right. Keep finger over center to hold layers in place. Fold long end back to center to make 1-1/2” loop on left. Fold ribbon back to center again creating 1-1/2” loop to right. Pinch ribbon at center and pick up layers. Set layered ribbon on brad with opened prongs. Fold prongs over ribbon and press flat. Trim ends.

Crafting Bow Techniques by CraftyPerson

4. Hole Bow: Punch a hole in card stock with 1/8” or 1/4” punch. Thread both ends of a 22” long ribbon up through hole from bottom. Slide ribbon loop around card stock and tighten by pulling ends. Keep ribbon ends the same length. Split ribbon ends so one comes out above ribbon and one comes out below. Make sure ribbon isn’t twisted. Tie a basic bow. Fluff and adjust bow as needed and then trim ribbon ends.

Crafting Bow Techniques by CraftyPerson

5. Fork Bow: Begin with a standard dinner fork with four tines and a 10” piece of ribbon. Place ribbon across front of fork with 1/3 of the ribbon to left of the fork. This end will stay stationary. Wrap right end of the ribbon around behind the fork, around left edge, over the top of the first end. Thread end down through space between the center fork tines below where the first ribbon crosses. Pull ribbon up behind the fork and through the space between center fork tines. Knot the two ribbon ends firmly. Slide ribbon from fork and trim ends.

Crafting Bow Techniques by CraftyPerson

Go Bow Crazy
Have fun practicing and experimenting with these bows and different types of ribbon. Pretty soon your friends will be asking you how your bows always look so great! We have a number of ribbons retiring this month. Make sure to order your favorites before they are gone!