Gift Tags, parties, and celebrations all go together!
My inkheaven blog was a course correction. Prior to my blog, I had a website which was featured in Stampin’ Up!’s demonstrator magazine, Stampin’ Success. However, time has a way of bringing about change and websites were not as fashionable in the creative world. Blogging was where it was at! So, in April of 2009, I started blogging here at inkheaven. That means that on April 30th, inkheaven will be 8 years old! Can you believe it? I’m pretty close to having 100,000 visits to my blog as well!
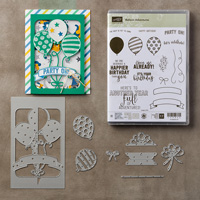
To create my celebratory gift tag I used products from the Party Animal Suite (one of my favorite suites!) The nifty little die from the Balloon Pop-Up Thinlits that I highlighted below creates the top of this tag:

Your gift tag can be any length, but it will have to be two inches wide. My favorite thing about this gift tag die is that it creates a topper for a tag that opens! It does this by creating the score for the fold. Plus, it creates the holes for the ribbon or baker’s twine, whichever you choose to use. I didn’t take a photo of the inside, but there is a piece of Whisper White card stock adhered to the inside where you can put a to/from and a little note or or greeting!
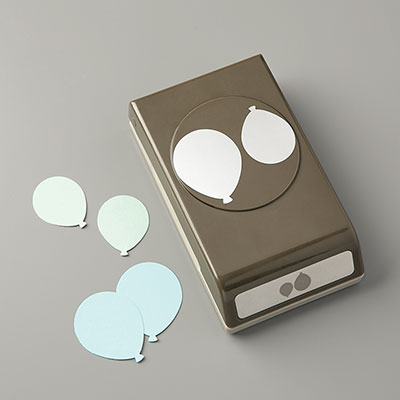
I did use the coordinating Balloon Bouquet punch for my balloons. The smaller balloon was used which is a great fit for the two inch tag. If you want to create your own gift tags with the Party Animal Suite, just click the Balloon Pop-Up Thinlits photo to be taken to my 24/7 online store. If you have questions or need assistance, contact me anytime here at inkheaven!
I have shared several fun cards created with products from the Party Animal Suite. You can click the links below to see them:
Tips on how to use the Balloon Pop-Up Die as a Card Front
Copy That Card in the Catalog, Please!
Hooray in Dapper Denim Reverse Words
How to Celebrate a Year of Birthdays
If you would like to learn more about the Party Animal Suite, sign up for my newsletter using the form in the side bar! After you sign up, you will receive an invitation to subscribe to a week long Occasions Catalog Tour; 7 daily emails, each day featuring a suite! (There are 7 suites in the 2017 Occasions Catalog).
I would love it if you would leave a comment and let me know how long you have been a part of my inkheaven journey! Years? Months? Days? First visit?
Thank you so much for stopping by to learn, create, and have fun with me! Be sure to come back and repeat the process as I will be sharing a few more cards with product from the Party Animal Suite over the next few days!