Party Animals For Your Birthday

Use these cute trouble-free party animals to help celebrate birthdays.

Use these cute trouble-free party animals to help celebrate birthdays!

This cute swap card was created by fellow demo, Selene Kempton. This card is another great example of using the Balloon Adventures stamp set with the Balloon Bouquet Punch.
I love the fun, playful look of the party animals of the animals in the Party Animal Designer Series Background. I think it’s perfect for kids cards and I am pretty sure that there are a few adults (like me) who are just fine with receiving a card created with these fun-loving animals! Plus, these party animals are completely trouble-free!
I love how the silver glimmer balloon jaunts off on its own. Isn’t it just like a balloon? Now that’s trouble! ha ha
I’m nearing the finish line for available prep time for my first upcoming open house this weekend – so I am going to hop off and get back to prepping! I’ll be loading my car up early to make my trek to Cedar Falls so I won’t have a blog post for you tomorrow so take some time to catch up on any back posts you might have missed and I will see you again on Monday!
Thank you so much for stopping by to learn and create with me. See you next time as we create, have fun, and share! Remember, you can be a happy shopper with me anytime at www.darlaolson.stampinup.net.

When Is A Pop-Up Not A Pop-Up?

When the balloon pop-up becomes a card front!

When the balloon pop-up becomes a card front!

This swap card by fellow demo, Bobbie Ganley is a great example of using the balloon pop-up die as a card front.
I really love the versatility of the Balloon Adventures Bundle which is part of the Party Animal Suite.
Bobbie really showed off the great coordination of the Party Animal Designer Series Background Paper on her card as well!
I have another idea for this pop-up die that I can’t wait to try!
In the meantime, I am very busy preparing for my upcoming last chance Open Houses for Sale-A-Bration! Did you know that there are only 25 days left of Sale-A-Bration? If you don’t know what Sale-A-Bration is all about, you can read about it by clicking here.
This bundle is the perfect item to purchase for Sale-A-Bration:
  • It’s $53 so you automatically get to choose a FREE Sale-A-Bration item.
  • It’s all about birthdays and celebrations (the older I get the more I like to celebrate birthdays!)
  • It has great coordinating product that you can add to your order so you can choose additional FREE Sale-A-Bration items! (Who doesn’t like FREE?
For your convenience, I am sharing a link to the bundle below. Clicking the image will take you to my 24/7 online store where you can have fun shopping! I hope you will add this fabulous bundle to your cart along with coordinating product so you can have even more fun picking out FREE stuff!
 
Thank you so much for stopping by to create and learn with me at inkheaven. See you next time as we create, have fun, share, and repeat!
 

Use Punches And Dies To Add Dimension To Your Cards

punched or die cut images and shapes layered on your cards add interest and dimension shared by Darla Olson at inkheaven

Punched or die cut images and shapes layered on your cards add interest and dimension.

I wish I could tell you who created this card. It is a nameless swap card. If this happens to be your card and you would like credit, just let me know!
This card is a great example of how punches and dies add dimension to your cards.
 
The creator of this card used a punch to create a color tag from background paper which grounds the focal point of the card. The sentiments are either punched or die cut with a circle, which is then surrounded by balloons that have been stamped and punched out and layered at various heights around the sentiment.
The Balloon Adventures stamp set and Balloon Bouquet Punch were used to create this card. Balloon Adventures also has a coordinating die set, Balloon Pop-Up thinlits, which can be purchased with the stamp set using the bundle and save feature. I love how Stampin’ Up! provides so many different coordinating punches and dies to add dimension to our card making.
For your convenience, I have listed the stamp set, bundle and save option for the dies, and the punch used in creating this card below. Clicking any of the images will take you to my 24/7 online store where you can have fun shopping for your own creative supplies! Thank you so much for stopping by to create and learn with me at inkheaven. See you next time as we create, have fun, share, and repeat!


Muted Dragonfly Dreams With A Pop Of Copper

Vellum mutes soft suede background dragonflies while detailed dragonfly stands out in front with a pop of copper shared by Darla Olson at inkheaven

Vellum mutes Soft Suede background dragonflies while the Detailed Dragonfly stands out in front with a pop of copper.

This lovely Dragonfly Dreams card was created by fellow demo, Donna Bamesberger. Donna created it for our Diva swap but she credits the original idea to Jan Clothier. Since I don’t peruse the internet or Pinterest a lot, so I had not seen this card idea. I am very happy that she decided to CASE (acronym for copy and share everything) this card.

I have not pulled out the vellum for awhile so I am thinking it may be time!

For your convenience, I have listed most of the supplies that she used creating this card below. Clicking any of the images will take you to my 24/7 online store where you can purchase what you need to recreate this lovely Dragonfly Dreams card.


Thank you so much for stopping by to create and learn with me at inkheaven. See you next time as we create, have fun, and repeat!

Sealed With Love Anytime Card

Sealed With Love doesn't have to be just for Valentine's shared by Darla Olson at inkheaven.

Sealed With Love doesn’t have to be just for Valentine’s.

I adore this soft and pretty card created by fellow demo, Maria Pobre. Her intent was to create a card that could be used for any occasion; birthday, anniversary, just because, Mother’s Day, etc. I think she did good!

Did you notice that she stamped the heart from the Sealed With Love stamp set on the Falling in Love Designer Series Paper? It’s so subtle that I almost missed it! It really adds a nice touch to the card.

For your convenience, I have listed most of the supplies that she used creating this card below. Clicking any of the images will take you to my 24/7 online store where you can purchase any of the items you need to create this card.


Thank you so much for stopping by to create and learn with me at inkheaven. See you next time as we create, have fun, and repeat!

Tips On How To Use the Balloon Pop-Up Thinlit Dies As A Card Front

Tips on how to use your balloon pop up thinlit as a card front

Quick video with tips using the Balloon Pop-Up Thinlit Dies as a card front!

I have been creating and having fun using my Balloon Adventures Bundle so I thought it was time to share!
Last year I made a decision to be better about sending out birthday cards and I have been using this bundle to help me do just that! 
While I was preparing for my card making class featuring the Balloon Adventures Bundle I decided to attempt using just the balloon bouquet and banner from the pop-up die to create a card front without the “frame” created by the die. This meant some snipping and fussy cutting had to take place. Uh, oh! Right? Sometimes, it can be challenging to fussy cut things out and still have them look nice!

This die does create some score marks that outline the banner making the banner portion easy to cut out so the biggest challenge was cutting out the balloons. I shared my tips for cutting out around the ballooons on FB Live but have edited it and am giving you the short and sweet version (less than 10 minutes!) that you can watch here:

For your convenience, I have listed most of the supplies that I used creating this card below. Clicking any of the images will take you to my 24/7 online store where you can have fun shopping for your own creative supplies! Thank you so much for stopping by to create and learn with me at inkheaven. See you next time as we create, have fun, share, and repeat!

It’s A Pluming Hey Chick Card!

Take a look at the unique card front on this pluming hey, chick! card shared by Darla Olson at inkheaven

Take a look at the unique card front on this pluming Hey, Chick! card.

This unique card with Hey, Chick! was created by fellow demo, Maria Pobre.

It’s no secret that I love this chick with the crazy plume in the Hey, Chick! Sale-A-Bration stamp set so it was pretty easy for me to fall in love with this card! It doesn’t hurt that she used Watermelon Wonder, either. I love that color and will hate to lose it!

This card front is unique and adds interest to the card. The card opens up by lifting up from the bottom. The focal point is attached to the flap at the top and the bottom is attached to the focal point which allows the inside of the card to peek through to the front and be part of the layered look adding a little more depth without extra thickness. Very nice!

For your convenience, I have listed most of the supplies that she used creating this card below. Clicking any of the images will take you to my 24/7 online store where you can be a happy Sale-A-Bration shopper!


Thank you so much for stopping by to create and learn with me at inkheaven. See you next time as we create, have fun, and repeat!


Hooray In Dapper Denim Reverse Words

Stampin' Up! Reverse Words looks fabulous in Dapper Denim ink shared by Darla Olson at inkheaven

Look at how fantastic Reverse Words looks in Dapper Denim! 

When I first break open a stamp set, I don’t always create a card right away. Sometimes, I like to just “warm up” to the stamp set. Many times my warm ups end up creating inspiration for my cards. Warm ups are a fun way to get familiar with your stamps and not feel any pressure to create a card.
When my 2nd release Sale-A-Bration order came I had intended to come up with a card or two for my FB Live but as luck would have it, I was otherwise occupied and did not have time to prepare one. So, as unnerving as it was for me, I decided to do a warm up on FB Live! It ended up being kind of fun once I got going! This card ended up as a result of my warm up that night! You can watch that video here:

Reverse Words is a 2nd Release Sale-A-Bration set and is FREE with a $50 order! Place your order today to get your FREE Reverse Words stamp set and help support my creative sharing here at inkheaven.

For your convenience, I have listed most of the supplies that I used creating this card below. Clicking any of the images will take you to my 24/7 online store where you can have fun shopping for your own creative supplies! 

Thank you so much for stopping by to create and learn with me at inkheaven. See you next time as we create, have fun, share, and repeat!

Building A Thank You Card For The Guys

A fabulous thank you card for the guys created with the stampinup nailed it bundle shared by Darla Olson at inkheaven

A fabulous thank you card for the guys created with the Stampin’ Up! Nailed It Bundle.

This thank you card is a swap built by fellow demo, Phyllis Strickland. 
She pretty much utilized most of the items in the Urban Underground Suite workroom to build this fabulous card. She added a pop of red to the Urban Underground color scheme which really makes the focal point stand out. It’s really quite stunning (in a masculine kind of way, of course!) Sometimes, building a thank you card for the guys can be daunting. But Phyllis knocked it out of the ball park using the Nailed It Bundle and Urban Underground suite of products.
For your convenience, I have shared her toolbox containing most of the supplies that she used building this card below. Clicking any of the images will take you to my 24/7 online store where you can be a happy Sale-A-Bration shopper! Be a happy shopper anytime with me here at inkheaven by clicking here www.darlaolson.stampinup.net.


Thank you so much for stopping by to create and learn with me at inkheaven. See you next time as we create, have fun, and repeat!


Beautiful You Reflection

This card created with Stampin' Up! Beautiful You has a reflection! Shared by Darla Olson at inkheaven

This card has a beautiful reflection!

I have another jaw dropping swap share for you today. This gorgeous card was created by fellow demo, Nancy Endwright.
I have to tell you that the reflection created with the reverse image, window sheet and silver foil paper looks incredibly real. This was one of those swaps that keeps words tumbling out of your mouth after you open the envelope: WOW! Would you look at that? What a unique idea! How cool is that? I could go on, but you get the idea!

For your convenience, I have listed most of the supplies that she used creating this card below. Clicking any of the images will take you to my 24/7 online store where you can be a happy Sale-A-Bration shopper! Be a happy shopper anytime with me here at inkheaven by clicking here www.darlaolson.stampinup.net.


Thank you so much for stopping by to create and learn with me at inkheaven. See you next time as we create, have fun, and repeat!

Do You Have An Incredible Everyday Hero In Your Life?

Here is a fun card for the incredible everyday hero in your life shared by Darla Olson at inkheaven

Here is a fun card for the incredible everyday hero in your life.

I love swapping with other demonstrators. Let’s face it, we look at everything through our own filters, which can be very limiting! Take my stamping filters for instance: nature, flora, sentiments, these things make up the bulk of my stamping collection! Then along comes an amazing swap card like this one created by fellow demo, Kendra Richardson and I have to stop and examine how I ran this stamp set through my filters. To be honest, I think my filters didn’t even put it on my radar screen! So, bad, I know! I can honestly say I know several people who truly are incredible. I know quite a few moms who are raising children with special needs. They are amazing everyday heroes who, for the most part, go unnoticed in our world. They, themselves, do not consider themselves heroes, and yet there they are, everyday, fighting battles that many of us cannot even imagine. I think of the pressures in my life that cause me to buckle and I am, well, humbled, to say the least. Yes, this swap card changed my perspective and stood me on my head. Even if you don’t use the Everday Hero stamp set, I hope you will join me in remembering an everyday hero in your life today.
For your convenience, I have listed most of the supplies that she used creating this card below. Clicking any of the images will take you to my 24/7 online store where you can be a happy Sale-A-Bration shopper! Be a happy shopper anytime with me here at inkheaven by clicking here www.darlaolson.stampinup.net.


Thank you so much for stopping by to create and learn with me at inkheaven. See you next time as we create, have fun, and repeat!


Do You Dream of Romantic Mediterranean Moments?

This beautiful card depicts a romantic, Mediterranean Moment and has been shared by Darla Olson at inkheaven

This beautiful card depicts a romantic, Mediterranean Moment and has me dreaming of one!

This dreamy card is a swap card created by fellow demo, Anita Watson. 
I have to confess that as pretty as the Mediterranean Moments stamp set is, all I could think of when I saw it was, “Wow, that’s a lot of coloring!”
Most of my stampin’ friends know that a lot of detailed coloring is not my thing! However, Anita managed to pull off this fabulous card with just a wee bit of watercoloring, changing my perspective just a bit! Plus, she pulled in the Brick Wall embossing folder, which is perfect! I know that the sentiment points to Valentine’s Day, but to be honest, this card has the potential to be so much more than a Valentine’s Day card. Don’t you agree?
For your convenience, I have listed most of the supplies that she used creating this card below. Clicking any of the images will take you to my 24/7 online store where you can have fun shopping for your creative supplies! Have fun shopping anytime with me here at inkheaven by clicking here www.darlaolson.stampinup.net.

Thank you so much for stopping by to create and learn with me at inkheaven. See you next time as we create, have fun, share, and repeat!

Hope Tomorrow Finds You Feeling Better

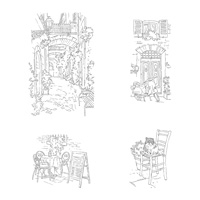
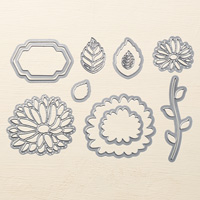
Feeling better card created with Stylish Stems Framelits

Hello Stampin’ Friends! I am excited to be highlighted in Kylie’s International Stampin’ Up! Blog Highlights, again! You will be able to VOTE for my project. The top ten winners will get to be a part of an international blog hop, so please VOTE for my project! I would love to be a part of this special blog hop!

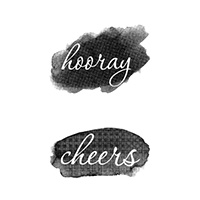
Our theme for this highlight is Get Well Soon! This theme worked out perfectly for me as I have a special stampin’ friend who has been ill and had surgery recently. I really needed a get well card! This card was quick and easy (my favorite kind) and I plan to make up a few to have some ready for the next time (even though I’m hoping I don’t have a next time! I really don’t like for my friends and family to not be well.)

Hope tomorrow finds you feeling better card created with Stampin' Up! Stylish Stems, vote for Darla Olson at inkheaven

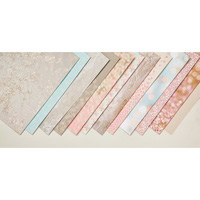
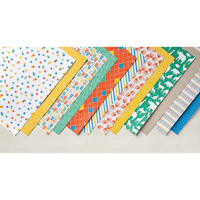
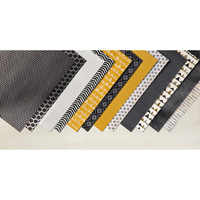
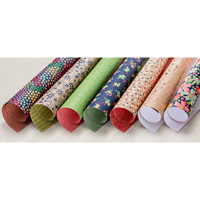
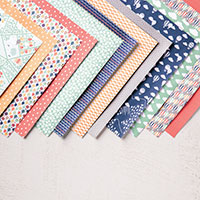
While pondering ideas for my get well card, I took a visual stroll through my supplies and this pretty sheet of butterflies from the Falling In Love DSP caught my eye.

Being a nature lover, and quite fond of sunny days, I couldn’t think of anything more cheerful than flowers surrounded by masses of beautiful butterflies, so that settled it!

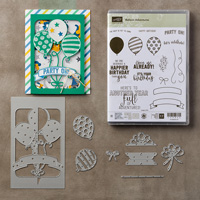
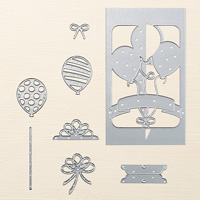
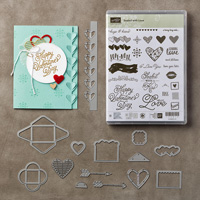
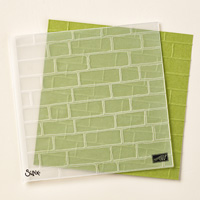
I also knew that the easiest way to achieve that look would be to use the new Stylish Stems Framelits Dies as their special design would allow me to die cut the flowers right into the paper, immediately surrounding them with butterflies!

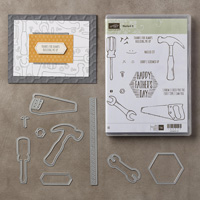
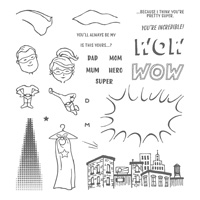
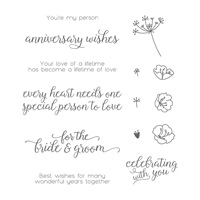
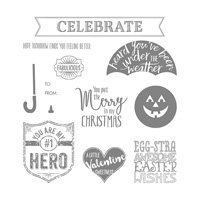
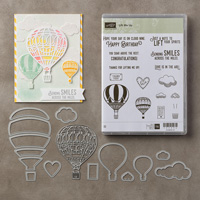
I took another visual stroll and the sentiment, “Hope Tomorrow Finds You Feeling Better,” from the My Hero stamp set caught my eye. Perfect! I have to put a plug in here for this very special set! When you purchase this set, Stampin’ Up! donates $3 to the Ronald McDonald House Charities, a very worthy cause! I can’t think of a more worthwhile purchase to add to your crafting supplies!

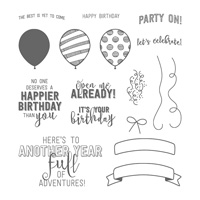
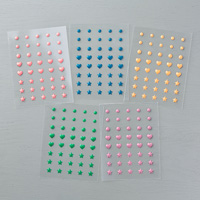
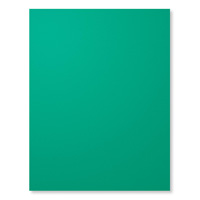
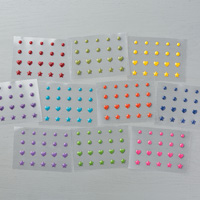
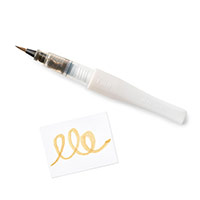
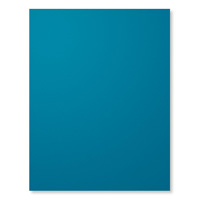
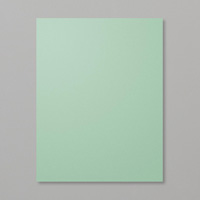
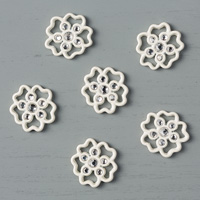
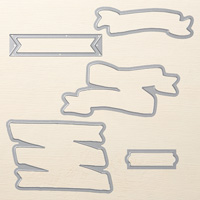
I finally landed on using a banner from the Bunch of Banners Framelits for the sentiment. To help the sentiment “pop” just a little more and not be obscured by the butterflies, I layered it over another banner cut from Sweet Sugarplum card stock and then accented it with a Falling In Love Embellishment. The floral jewel is pretty and adds a bit of sparkle. The only thing that I did not add (only because I discovered that all three of my tubes where empty, gasp!) was a bit of Clear Wink of Stella to the flower petals.

My goal was to not only provide you with a visually pretty card, but to also make it a card that could be easily duplicated. If you think that I have presented a visually pretty card that can be easily duplicated please go VOTE for me!

 Vote For My Project, Darla Olson at inkheaven!
If you are visiting my blog from the USA you can order any of the products that I used in creating this card from my 24/7 online store which is located at www.darlaolson.stampinup.net.
For your convenience, I have provided links to the products below which will take you directly to my online store.
Thank you so much for stopping by to create and learn with me (and for voting)! See you next time as we create, have fun, and repeat!

Lift Me Up Puts Love In The Air For Valentine’s Day

Handmade card created with Stampin' Up! Lift Me Up Bundle shared by Darla Olson at inkheaven

Stampin’ Up! Lift Me Up Bundle puts love in the air! 

Happy Valentine’s Day!

This was a fun card to put together. The different levels of layer and texture give it great visual interest and except for placing the balloon basket, very easy! (And that really wasn’t hard, it just required a few extra steps.)
It is difficult to see in the photo but the balloon is cut out of the Real Red and recessed into the Whisper White. The clouds add another dimension as they are cut out with the dies and layered on top of the card. And, with the Falling Petals Folder adding “hearts” to the Real Red layer it looks great! 
To get the basket placed, I lightly tacked down my Real Red layer and lightly penciled in where the basket needed to be stamped. Then I removed the Real Red layer and stamped my balloon basket over my outlined area. This is one place where photopolymer would have appealed to the lazy side of my stamping! However, I have this set in clear mount so I had to pull out my Stamp-a-ma-jig to get the proper placement (woe is me, right? I’m such an eyeball-er! ha ha). Once the basket was stamped the Real Red layer could be permanently applied to the Whisper White card base. (Note: The balloon was die cut prior to being ran through the Falling Petals folder.) 
After the Real Red layer in set in place, it’s pretty easy to center the love heart in the center of the balloon.  
Since the clouds are die cut and added on top those are pretty simple. I did have to stamp the sentiment on Whisper White prior to die cutting my cloud. It.Just.Fits! I layered those with glue dots. I wanted just a “little” pop-up.
Have I mentioned before how much I love the Falling Petals embossing eolder? I love how it looks like hearts and can’t wait to start playing with it more as a floral texture later. It’s been a great texture add to those Valentine Cards! 
Did you know that just purchasing the Lift Me Up bundle and the Falling Petals embossing folder earns you a free Sale-A-Bration set? That alone puts my heart up in the air! Check out the fantastic Sale-A-Bration items:
Click here to see the FREE Sale-A-bration items!
For your convenience, I have provided links (just click either image below) to these two fabulous items that will take you to my 24/7 online store where you can put them in a shopping cart and get your FREE Sale-a-Bration item! Don’t miss out on the hours of fun having these in your craft room will bring! Sale-A-Bration will be over before we know it!
Thank you so much for stopping by to create and learn with me! See you next time as we create, have fun, and repeat!
  

Carried Away With A Lift Me Up Card Bonanza!

How would you like to get carried away with a lift me up card bonanza? Get a free supply packet with your $150 order by February 20, 2017 from Darla Olson at inkheaven.

How would you like to get carried away with a Lift Me Up Card Bonanza?

Have you seen this great video tutorial shared by Stampin’ Up! showing how to create these 12 awesome cards?

Wasn’t that just totally fabulous? I know what I am going to be doing for my next batch of birthday, thinking of you, and just because cards!

To make it easy for you, I have posted all the items that you will need to have to create these fabulous cards at the bottom of this post. (Please note that the bundle isn’t necessary, but you save 10% with the bundle and get the fabulous Up and Away Thinlits, so why wouldn’t you?) Clicking any of the images will take you to my 24/7 online store where you can place your order. Did you know that the Carried Away Designer Series Paper and the Card Tin are both Sale-a-bration items that you can get for FREE with a $100 order! You will want that card tin to put all of your fabulously handcrafted cards in! The tins also work well for embossing folder and die storage as well!

However, if you place a $150 order with me by March 31st, you will receive $15 in Stampin’ Rewards and 3 Sale-A-Bration items of your choice from Stampin’ Up! AND

To sweeten the pot, if you place your order of $150 by February 28th with me, here is what you will get from me!

  • You will receive all the pre-cut supplies you need to make all 12 cards, plus the envelopes! How sweet is that? When you place your online order make sure that you DO NOT select *no contact* or I will not know where to send your FREE packet of supplies to create these 12 fabulous cards!
  • Your FREE Packet will be postmarked no later than March 15th, depending on when you placed your order. For those of you attending my Open House in Cedar Falls or Charles City, Iowa; you will receive your packet at my Open House!

In addition, if you order the Lift Me Up bundle through me, you will also be given an added BONUS for my upcoming Lift Me Up Online Class complete with Videos and tutorial sheets! My online class will consist of 4 Lift Me Up cards that I created as a Display Stamper for OnStage 2016 Kansas City. This online class will be offered for the one time BONUS PRICE OF $15 (valued at $25) to those who purchase the bundle through me and will be available in March! Remember, only those who order the bundle through me will be receiving the BONUS price on their class! You will receive a special link via email to order at the BONUS price! So, don’t delay! Click on any of the images below to be taken to my 24/7 online store to take advantage of these special offers! The clock is ticking! You can be a happy shopper with me anytime at www.darlaolson.stampinup.net.

If you are not familiar with my tutorial sheets, you can see one and download it from HERE.

Thank you so much for stopping by to create and learn with me. See you next time as we create, have fun, and repeat!