Sailing Into the Sunset With Swirly Bird

“To reach a port we must set sail –
Sail, not tie at anchor
Sail, not drift.” 
― Franklin D. Roosevelt

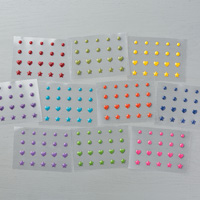
Sailboats and sunsets really do go together. There is something really picturesque and peaceful about the combination. My original idea with this design was a retirement card. However, not everyone has need of retirement cards, so for my classes I went with a generic, “It’s your big day!” I also did not have enough of the enamel dots for class, so I punched out Cherry Cobbler stars with the Confetti Stars Punch as a substitute for my classes.

I stamped this card and put it together on FB Live if you would like to see how it all came together:

For your convenience, I have listed most of the supplies that I used in the creation of this card below. Clicking on any of the images will take you to my 24/7 online page where you will want to add them to your cart so you can have them delivered right to your door (and earn those $5 Bonus Coupons!) Haven’t heard about those coupons? Check it out! It’s the last week to earn those coupons so don’t procrastinate! (This awesome offer ends on Sunday!) Thanks so much for stopping by!

Swirly Scribble Turned Hoot Owl

Isn’t this card a hoot? (Was that a bad pun?) I wish I could say that the owl idea is original to me – but it is not. The owl idea is a CASE (copy and share everything). However, the card itself is an original. Owls are nocturnal so I was going for a nighttime look. I love how the branch that my owl is sitting on turned out! I like the card better when one of the three stars is black because it pulls it all together a little better. However, there were just not enough black stars in my metallic sequins! Since this was one of the card in my Swirly Bird/Scribbles Classes; I tried to make sure that all of my card makers would each have a black star.

For your convenience, I have listed most of the supplies that I used in the creation of this card below. Clicking on any of the images will take you to my 24/7 online page where you will want to add them to your cart so you can have them delivered right to your door (and earn those $5 Bonus Coupons!) Haven’t heard about those coupons? Check it out! It’s the last week to earn those coupons so don’t procrastinate! Thanks so much for stopping by!


Background Watercolor Video Tutorial With Floral Phrases

This card was my absolute favorite of the three cards we did in my Floral Boutique Suite classes. The soft water-colored background is stunning and very easy to do! I demonstrated this technique on FB Live and if you watch it all the way to the end there is also a little tip for getting more shimmer with the clear Wink of Stella. You watch the video here:

For your convenience, I have listed most of the supplies that I used in the creation of this card below. Clicking on any of the images will take you to my 24/7 online page where you will want to add them to your cart so you can have them delivered right to your door (and earn those $5 Bonus Coupons!) Haven’t heard about those coupons? Check it out! It’s the last week to earn those coupons so don’t procrastinate! Thanks so much for stopping by!


How to Create a Background Without a Stamp Positioner

I created this pretty card using products from the Floral Boutique Suite. I created my own background using a stamp from the Floral Phrases set and I have some tips for you on how to do that in a FB Live video on my Facebook Page here:

For your convenience, I have listed most of the supplies that I used in the creation of this card below. Clicking on any of the images will take you to my 24/7 online page where you will want to add them to your cart so you can have them delivered right to your door (and earn those $5 Bonus Coupons!) Haven’t heard about those coupons? Check it out! It’s the last week to earn those coupons so don’t procrastinate! Thanks for stopping by!

Draped Floral Phrases Thank You Card

I love the texture and interest that the drapery technique gives to cards and when I saw the Floral Boutique Designer Series Paper in the Floral Boutique Suite, I knew that I wanted to try one with it and do it in my Floral Boutique Suite Classes.

I love how it turned out! I especially love this paper design with the floral stamp. However, I ultimately will not be using it to many drapery cards just because I can only get one card with the floral design in the paper right-side-up. Not a big deal to some, but it messes with me and I just can’t do it! lol!

However, I did find another sheet in the Floral Boutique Designer Series that worked out really well for me and my sense of “right-side-up” and I even have a tip for you to help you cut your paper correctly on the diagonal every single time! Here is the card:

I have a FB Live video on my FB Page for you sharing my little tip for cutting the paper correctly on the diagonal every time when creating these fun skirted cards! You can check that out by clicking my facebook link:

For your convenience, I have listed most of the supplies that I used in the creation of this card below. Clicking on any of the images will take you to my 24/7 online page where you will want to add them to your cart so you can have them delivered right to your door (and earn those $5 Bonus Coupons!) Haven’t heard about those coupons? Check it out! Thanks for stopping by!

Ombre Thankful Thoughts Gift Bags

I have had a few online orders and I appreciate each and every order very much because it allows me to continue being here to share with you! I send a thank you card for each and every order because every order is important to me. However, every now and then I get some larger orders that I feel warrant something a little extra special in acknowledgement. I have been working on these Ombre Thankful Thoughts Gift Bags that are adorned with a little reusable product and contain some of the great cards that I have been working on as an extra special thank you! I’ll be honest – I wish I was making up a lot more of these! I have a few more to put together. Hopefully, I will get them all done before my events as I want to hand-deliver if possible!

For your convenience, I have listed most of the supplies that I used in the creation of this project below. Clicking on any of the images will take you to my 24/7 online page where you will want to add them to your cart so you can have them delivered right to your door (and earn those $5 Bonus Coupons!) Haven’t heard about those coupons? Check it out! Thanks so much for stopping by!

Playful Palette Party Cone Video How-to

This fun party cone was inspired in part by the fact that this is National Ice Cream month! Originally, I just wanted to make sleeves for ice cream cones…and then it developed into the idea as using the cones as party favors. These are stuffed with a little stamping fun for a stamping event…but think of how fun they would be stuffed with little treats for any kind of party! Think birthdays, Christmas, Thanksgiving, Halloween, even May Day baskets. They would even work for weddings! How fun would it be to fill them with bird seed to fling at a wedding? The ideas are probably endless and more than I could come up with – so be sure to share any different ideas that you come up with in the comments! The rest of us would love to hear them!

These were incredibly easy to make and no template is required! To see just how easy, hop on over to my Facebook Page to view a short FB Live video.

For your convenience, I have listed most of the supplies that I used in the creation of this project below. Clicking on any of the images will take you to my 24/7 online page where you will want to add them to your cart so you can have them delivered right to your door (and earn those $5 Bonus Coupons!) Haven’t heard about those coupons? Check it out! Thanks so much for stopping by!

Direct-to-Paper Technique With Ombre

I love that we now have a few Ombre ink pads. They remind me of the rainbow pads that we used to have years ago. While some of them were indeed more colorful, like rainbows; some of them were Ombre although they weren’t referred to as such.

This ink-direct-to-paper technique was one of my favorite ways to use them back then; and it probably will still be as I am one of “those people” who doesn’t really care much for coloring. I enjoy coloring…in small doses.

Here is a line up of this card created in all the gorgeous ombre colors:

Normally, I am a Calypso Coral girl all the way – but with this technique and card- Bermuda Bay is my fave! For a quick video with tips on how to do this technique, hop on over to my Facebook Page. I did a short and sweet FB Live video for you.

For your convenience, I have listed most of the supplies that I used in the creation of this card below. Clicking on any of the images will take you to my 24/7 online page where you will want to add them to your cart so you can have them delivered right to your door (and earn those $5 Bonus Coupons!) Haven’t heard about those coupons? Check it out! Thanks so much for stopping by!

Simple Yet Elegant Wedding Wishes

The Floral Phrases Stamp Set paired with the Details Floral Thinlits Dies creates simple, yet elegant, wedding wishes, every time. Plus, with Bundle & Save you get to automatically save 10% by purchasing them together!

I wish I knew someone who was getting married and wanted me to help them make their wedding invitations as this bundle is just perfect for creating invitations along with a RSVP card (plus thank you notes!)

A combination of a little stamping and a little computer printing all wrapped up in this gorgeous die with satin ribbon – yummy! If you love this look and want to use it for your wedding and you are not sure how to combine using your computer and stamps; send me a message because I would be more than happy to set up the computer file for you to download and print to use with your stamps to make your own invitations! Plus, I will help you figure out what to order based on how many inviations you need, etc. I am your creative resource for all things Stampin’ Up!

For your convenience, I have listed most of the supplies that I used in the creation of this card below. Clicking on any of the images will take you to my 24/7 online page where you will want to add them to your cart so you can have them delivered right to your door (and earn those $5 Bonus Coupons!) Haven’t heard about those coupons? Check it out! Thanks so much for stopping by!

How to Stencil Mountains with Detailed Floral Thinlit Dies

Hello Stampin’ Friends! This card was inspired by a late evening walk after the sun was mostly set behind the Loess Hills of Western Iowa.  It was a gorgeous evening with the dusk disguising the rays of the setting sun. As I walked and gazed upon this wondrous beauty, I found myself wishing that I could take a photo to share it…but I didn’t have my phone with me. My morning and evening walks I totally unplug! Since I couldn’t take a picture, I intently studied the skyline as I walked and began to think about my stamping supplies and how I might be able to capture the its essence that way. The next morning I came up with this card and am totally pleased with the results! To see how I did it you can hop on over to my Facebook page for about 15-20 minutes of video (or however much of the video feel you need).

For your convenience, I have listed most of the supplies that I used in the creation of this card below. Clicking on any of the images will take you to my 24/7 online page where you will want to add them to your cart so you can have them delivered right to your door (and earn those $5 Bonus Coupons!) Haven’t heard about those coupons? Check it out! Thanks for stopping by!

Stencil a Few Clouds for a Silver Lining

I have been having a total blast discovering multiple used for my Detailed Floral Thinlits Dies. Anytime I can get more bang for my buck…I am a happy camper!

If you haven’t guessed it yet…I used this die to create a cloud stencil! For a quick video of this, head on over to my Facebook Page and check it out!

For your convenience, I have listed most of the supplies that I used in the creation of this card below. Clicking on any of the images will take you to my 24/7 online page where you will want to add them to your cart so you can have them delivered right to your door (and earn those $5 Bonus Coupons!) Haven’t heard about those coupons? Check it out! Thanks for stopping by!

Snow in July!

When the temps are 90 degrees and the humidity close to 100 percent; the thought of a little snow sounds absolutely wonderful! Temporarily, mind you! I’m really not a fan of extremes either way. Meanwhile, I’ll be content creating my own snow during the dog days of Summer. Would you like to join me? I’ll tell you how…here is what you will need:

Generated by SUDSOL, Free Trial at www.sudsol.org

If you don’t have what you need, you can click on any of the images to be taken to my 24/7 online store where you can add it to your cart and get it shipped straight to your door! (Don’t forget you will earn $5 bonus coupons for every $50 spent in July that you can use in August!)

Next, head on over to my Facebook Page for a quick video (it’s quick because it is that easy!) Enjoy and thanks so much for stopping by!

Creating Stencils With Floral Thinlits Dies

I love the Floral Thinlit Dies – but I also looked at them and thought that they would make a great stencil. So I created a stencil and gave it a go. I’m quite pleased at the results and plan to reuse my stencil soon. I may even go hog wild and make one out of a Window Sheet to have a more permanent stencil! LOL!

Creating a stencil with the Floral Thinlits Dies is so very easy…all you have to do is cut out your die! I do have a few tips for you via a Facebook Live video on how to get the best results from your stencil once you have it cut and you are ready to add ink! You can check it out on my Facebook Page.

 For your convenience, I have listed the supplies I used in the creation of this card. Clicking on any of the images will take you to my 24/7 online store where you may purchase what need to recreate this card for yourself;  Thanks so much for stopping by!

Burlap Wedding Decor Theme

Burlap decor in weddings has been pretty popular. Paired with white and a little lace it has an understated elegance that can be used in just about any setting! I love Night of Navy and when I first laid eyes on the Burlap Ribbon I knew I wanted to use it on a Night of Navy card- so my first card I went with that and Crumb Cake…but I think it would look just as awesome with with a tone-on-tone Whisper White and plan on giving that a go when I get an opportunity. I’ll share it with you when I get it done! I only put one Rhinestone on this card initially – but the more I look at it – I think I will be adding two more up by the sentiment somewhere. Sometimes my cards evolve a little bit more with time – how about you?

I think the Floral Phrases Bundle is gorgeous and would make awesome DIY wedding invitations!

For your convenience, I have posted the supplies used in the creation of this card below. Clicking on any of the product images will take you to my 24/7 online store where you can shop for the supplies you need to recreate this lovely card!

Don’t forget that you can get a $5 coupon to use in the month of August with your purchase!

Switching Things Up For A Different Look

So…I am still Swirly Scribblin’. I really wanted to play with my Seaside Embossing Folder and some ink…so I didn’t change my card design too much. However, by using only one flower I was able to use a different sentiment and adding the ink with the folder gave it a different look. I like it! If you would like to see the technique used for the coloring on the bottom half of my card, I have a Facebook Live video on my FB Page:

For your convenience I’ve posted a list of the supplies used in the creation of this card. Clicking on an of the items below will take you to my 24/7 online store where you can throw what you want in your shopping cart and have some stamping happiness brought to your door. Just be sure to make sure you spend $50 so you can get your $5 bonus coupon for August! Thanks so much for stopping by!