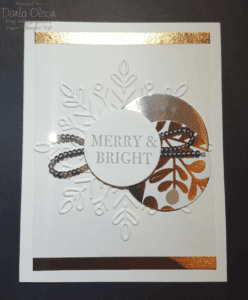
Merry and Bright Christmas Card Cased From Stampin’ Up!’s Holiday Catalog
Isn’t this Christmas Card just gorgeous? I love simple WOW cards and this Merry and Bright Christmas Card falls into that category! This card started out as a CASE (Copy and Share Everything) of the “cheers to a new year!” card on the bottom of page 36 of the 2017 Stampin’ Up! Holiday Catalog. (If you don’t have a catalog you can find out how to get one by clicking here.) As I got to work on the card it quickly became apparent that I needed to make some changes! Here’s why:
- Cheers to the Year stamp set was not in my stamp collection! (I know. I know! What was I thinking?)
- Heat embossing was out of the question because I needed it to be quick for a Make and Take!
- Simple is good but sometimes just adding a simple layer adds to the wow factor.
So, what do you do when you see a card you want to copy and you don’t have the sentiment? Pull out what you do have and find an alternative. Or order what you need, wink, wink – but I didn’t have time for that – I was working with a deadline!
The Process of Casing a Christmas Card With What You Have
Since I did not have time to order the Cheers to the Year stamp set, I needed to figure out if I could CASE the Christmas Card with what I had on hand. Since I knew I wanted to add a layer to the card, I started with that. Once I measured, cut, and embossed my layer, then I was able to determine the best size for my circle layers. TIP: The easiest way to do this is to have the Layering Circle Dies cut out in copy paper (just store these with your dies) so you can lay them over your card front and visually see what will look good. No need to waste that precious (and gorgeous) Designer Series Paper! I also have the Lowdown on the sizes of the Layering Circle Framelit Dies that you can download here.
After you have determined the size of your circles, the next step is to take the one that you will be stamping the sentiment on and using it to find a sentiment in your collection of stamps that will fit. I already had an idea of what I wanted to use so I pulled out my Hearts Come Home Bundle, much to my delight (and relief) the “merry & bright” sentiment was a perfect fit!
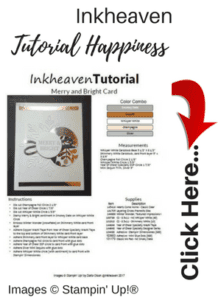
FREE Inkheaven Tutorial for the Merry and Bright Christmas Card
Since this card was created as a Make and Take for my Holiday Catalog Launch, I put together a tutorial complete with supply list for my attendees. To celebrate my new blog and return to blogging, I will be sharing more Make and Takes, Class Cards, and Tutorials for you to download over the next few weeks so be sure to check back!
Thank you so much for visiting my blog today! If you enjoyed this project and would like to duplicate it, please be sure to purchase the products you need from my online store.

Please come and visit me again as I will be creating more stamping happiness for you soon!